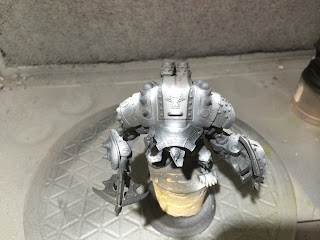
First and foremost, this model is just fantastic. I think I have gushed over it a bit to this point, but it does need some more praise, The lines are smooth, the larger open surfaces are curved to capture the light just right. and the detail is fantastic for PVC.
Back to the topic at hand. I gave the primer a full 24 hours to dry. I have found that Vallejo Surface Primer is fantastic stuff but it needs a while to fully cure. I am pretty sure that I would be fine leaving it for 8 hours or so but over night works well so why mess with it? I then gave the model a quick coat of Vallejo Model Color - Grey/Black. The darker undercoat is critical for the highlighting effect I am using, Don't worry about the Grey/Black being a bit too light as the shadows will be darkened later with washes.
I helped the undercoat dry a bit faster using strait air out of the airbrush and then it was time to add the first layer of highlights. For the first highlights I use Vallejo Game Color - Stone Grey. Its a good contrast to the Grey/Black and it can get very "bright" without having to go up through white.
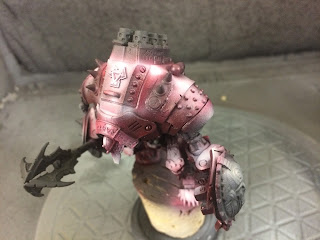
Next up was the first layer of ink. I used the D&R -FW Red Ink. This stuff is amazing and can be found at Hobby Lobby for about $4 with a coupon. One pot should last you years. To give a bit of perspective I used 5 drops for this layer.
As you can see the first layer of inks leave just a bit of the highlights showing through underneath, It's a good layer to build upon. You may also notice that the ink is a bit on the pinkish/purple side after drying. This is fine and we can use it to our advantage in the next steps.
For the second highlight layer we want to add a bit of "warmth" to our colors. I used a mix of Vallejo Model Color - Flat Flesh and Vallejo Model Color - Carmine Red at a ratio of 10:1. This is a pretty good mimic of Vallejo Model Color - Bright Flesh (which is about impossible to find for some reason). You want to go a bit bigger on this highlight stage, go really bright on the spots you want to really show though. I would recommend shining your painting light down on the model to really get a feel for where the light hits the model. This will tell you were your highlighting should be focused.
So here we are at the end of a bunch of pictures.
Next up I will add the second ink layer using P3 - Red ink. I use the P3 for the second coat as it has a bit more of an orange tint and will blend well with the layers underneath to give a vibrant red look to the model.
Stay tuned, This will be a very ambitious paint job as I will be doing a bit of the same technique but in green on the shield, mace and runes around the head. Should be fun.....or maybe just leave me crying in a corner, only time will tell.
Oh and I got the base primed and blacked for the dry brushing to follow.


No comments:
Post a Comment