Tuesday, September 30, 2014

Gorman.

I felt like painting something tonight. I was not in the mood to be technical or do a tutorial, or really care if I stayed in the lines. I just wanted an easy model that would look decently good on the table top. Low and behold, there he was just sitting on my painting table, primed up from a month or so ago daring me to slap some paint on him.

Now if you are not familiar with Gorman from the PP line he is usually done in really dark tones, sometimes with OSL off the vials on his belt. Sometimes done up like Dark Wing Duck (which I find very cool). But for me today this model was something I could paint up in about an hour, be done with and have it be table top quality.

I used PP Cryx Bane Base on the cloak, PP Pig Iron for the metal trim and all the other metal bits. Vallejo Game color Electric Blue on the vials, and goggles, Vallejo Model Color Carmine Red on the sash/throat thingy. and Vallejo Model Color Mahogany Brown on for the leather. The brass is from the new Vallejo Game Air line Brassy Brass and man is it pretty in person. Oh and Vallejo Model Color Dark Grey for his cloths. Once dry I hit the brown and red with some of my still coveted Devlin Mud, and the green and grey with Vallejo black shade wash.

He is shiny in the pics because the washes are still drying. I will gloss then matte coat him and call it a day.

The base is a trench base from Secret Weapons Miniatures.

Again this is not anywhere near my best work, this is just something I felt like speed painting for funz.


Sunday, September 28, 2014

Knight Titan Finished!

He is done. This was a really fun project I learned quite a few lessons from how to glue the legs on backwards to cutting a full size base out of a single piece of cork. I really like how this one came out.

So have some pics.


Friday, September 26, 2014

Knight Titan 11 - Just about done.

So this bad boy is just about in the books. I hit it with a satin varnish from Vallejo and its drying as we speak. The last Real Water Poor is in and curing as we speak. I'll probably hit it with some Iron Oxide powder from Secret Weapons Miniatures to dirty it up some so its dirty and rusty and we should be done.

The other last thing to do is going to be adding pins to the feet and to the base. The interesting thing is that the feet are hollow so I will have to put a ball of Green Stuff in there and add the rods to it. Then drill into the cork of the base and BLAM....Science.

Also I am having some real professional type pictures taken of this guy on Sunday so expect a picture heavy update Sunday night / Monday day.


Wednesday, September 24, 2014

Knight Titan Base 2.0 - the pouring of the water.

Well I had some free time this morning so I was able to get the base looking like rock. I used the airbrush to hit it with Vallejo Model Color Black Grey. Then proceed to add a bit of Vallejo Model Color Stone Grey in ever increasing amounts and dry brushed it on to give the rock some "depth". Once that was done it was time to start pouring the "water". I used Secret Weapons Miniatures Realistic Water (because I had a few bottles on hand). It will take several applications because you can only pour about 1/8" at a time.

So this will take a few days to build up all the way and spill over a bit.

But for now have some shiny new pictures.

Here is what it looked like after the dry brushing.

Here is the first pour.

Making sure it looks good on the base.

From the back. 

Looking down. 

And the wide shot for funnzies. 


Tuesday, September 23, 2014

Knight Titan Base 1.0

Well kids I have recovered from the PBR and it was time get the base ready.
I went back and forth and then around again figuring out just how to make what I wanted it to look like in my head actually appear in reality. I had started with the idea of making a silicone mold of a chaos star and pouring the Realistic Water into it, then attaching it to the base and using spackle around it to make it look like a chaos like mud hole. This would have been expensive and I'm still not sure it would have looked all that great. I went to the internetz for help and got a reply on My Dakka Help Thread. I owe an apology to a user Queen_Annes_Revenge for suggesting cork. I dismissed it out of hand and wound up using it. So Bravo Good Sir, Bravo.

So how did I do it you ask?

Well I started with a round of cork. I placed the Titan on it and with a sharpie I marked where the feet would wind up. Then I drew out the 8 sided star between the feet.


Then it was on to the messy part of cutting out the star without breaking the cork. I used a very sharp X-Acto knife and a bit of luck. 


As you can see I glued a few pieces of broken off cork here and there to make some rocks 

After that it was time to prime. I took the plastic base that I had already primed yesterday and put down a circle of dark red in the middle to go under the Chaos Star. It will help with the coloring of the water down the road. 


Here you can see the "finished product". Now it needs a while to dry and for the glue underneath to set. After that its onto pouring the Realistic Water. This will be a several day project as you can only pour about 1/8" at a time, and the cork is about a half inch thick. I am using the stuff from Secret Weapons Miniatures as thats what I have on hand and I got it cheap online.


P.S Sorry about the first two pics. I can't get them to rotate even though they are showing the right facing on my computer. If anyone knows how to fix this please let me know.

Monday, September 22, 2014

Knight Titan 10.0

It's getting so close to being done. I can feel the excitement in the air. The last few touches and Blam something new and exciting has been finished. Ok, enough poetic waxing. I had planned to work on this last night but I was way to tired to even walk down to the basement let alone mess with a model. So today I was bright eyed and had enough beer on hand to give it a go.

I started by cracking open a 24oz PBR, then it was time to put the beast together.


It was at this point that I realized I had never actually finished the shoulders..... So off to the painting desk I went

30 minutes later....


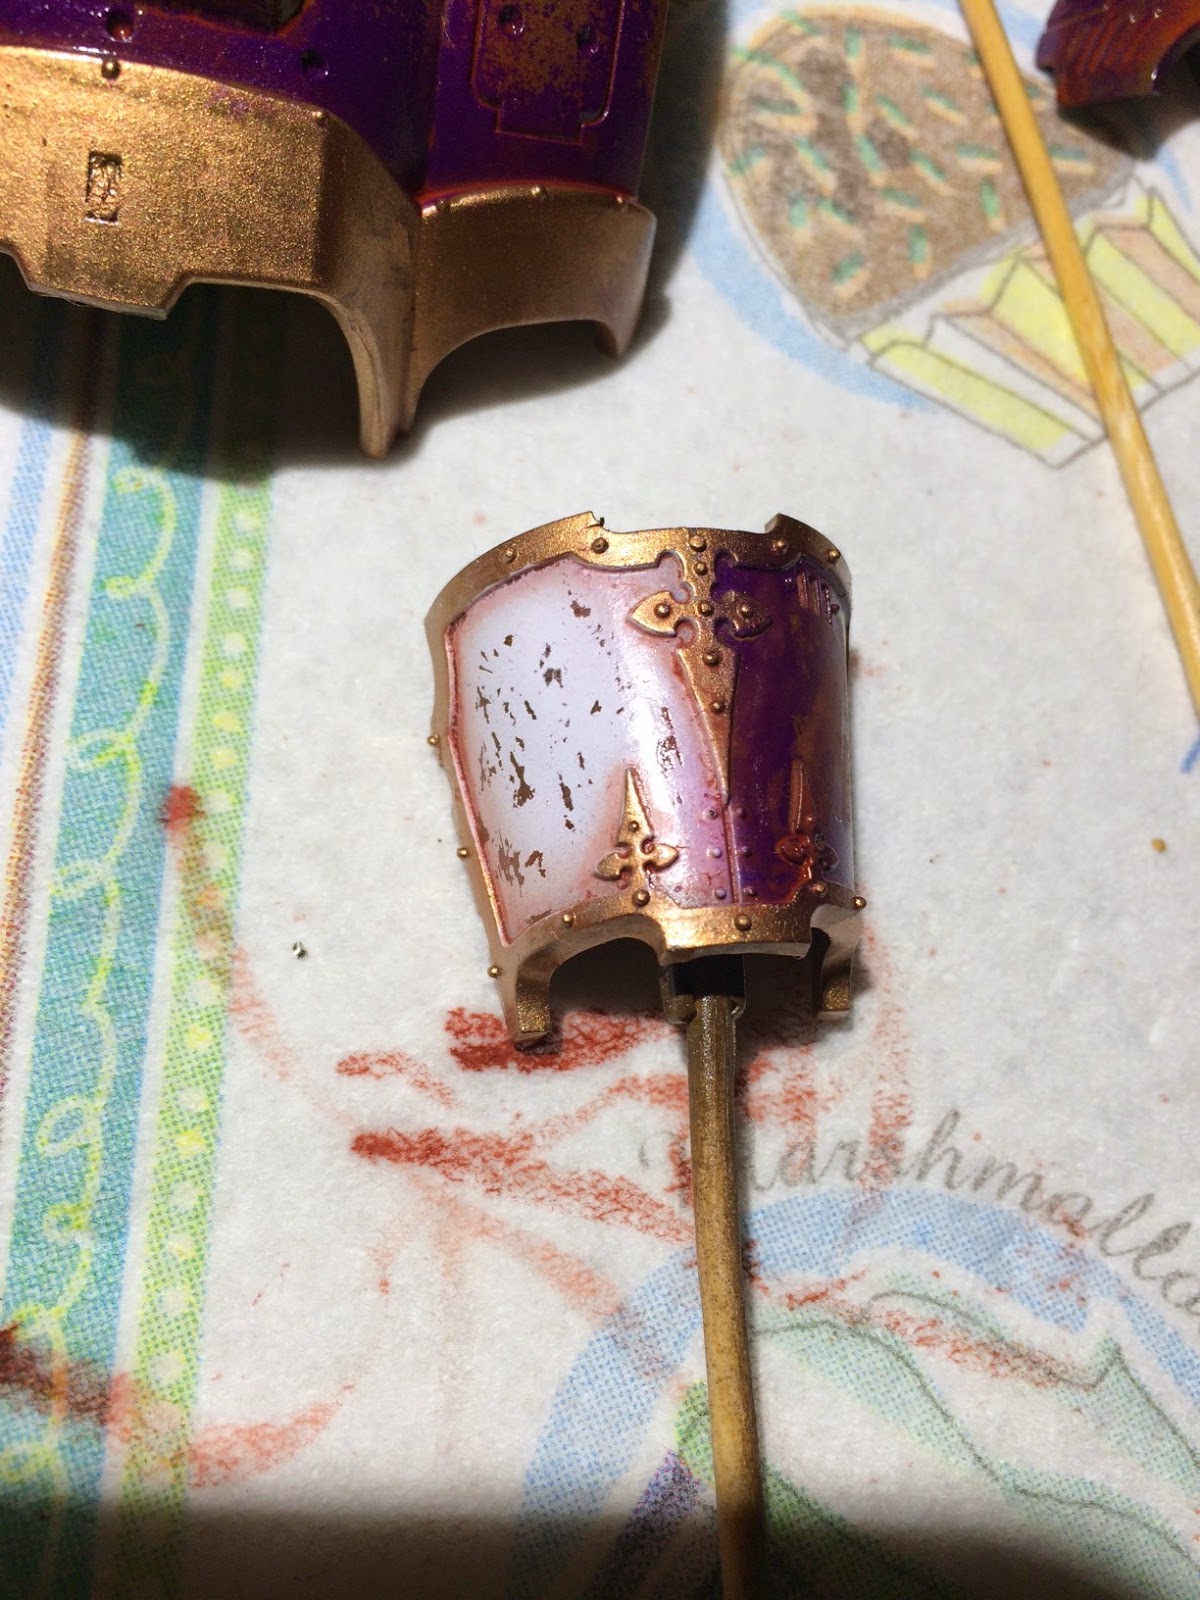
What is not shown is the powders added to the whites of the shoulders as for some reason they would not chip.... Not cool shoulders but powders made it look better and another shot of oil wash will bring them in line with the rest of the model. 

I was also able to the the base primed so thats a thing. 


Friday, September 19, 2014

Knight Titan 9.0  - Oil, oil everywhere....

Well I got home after what was supposed to be a 24 hour shift that turned into 36 hours between both jobs (gotta keep them kids fed). I'm tired but really wanted to get some work done on the Titan.

I hit the parts with Testers Gloss Coat. It's the best thing out there when it comes to gloss coats and you want something very strong and durable when you are about to make an oil based wash so as not to eat the paint underneath.

I chose to go with a really orange oil wash on this one to highlight the rust. I want a brighter rust to contrast the purple and stand out. It also sets a good tone for the next step in the process....... Powders.

So I used this stuff.

I got it from Hobby Lobby with the 40% off coupon for something like $5. This is probably more than I and 10 friends could ever hope to use, but oils never dry out so its all good. 

I grabbed about a 2mm round balls worth of the stuff out and mixed it with Odorless Mineral Spirits to make the wash. I wish I could give you a ratio but I can't. How I do it is I mix it nice and thin to the point of some translucence, then blot it on a paper towel. If it spreads out in a nice spider pattern I know its good to go. 

I started applying the oil wash on the turtle top thing and let capillary action bring it down into all of the nooks and crannies (another bonus to gloss coat). 


You can see how the orange of the wash really brings out the browns of the rust already. 

Then it was onto the leg guards. Now with whites you have to be really careful as you cant just smear it all over and hope for the best. I applied it mostly around the edges and it will set up the powders better on these. 


Same thing with the white on the mask, but I did go with a heavier wash on the silver hear. 

Here is a shot of the legs and torso for good measure too. 


And now its time to wait for the oils to dry at least over night. Oils take a very long time to dry (oil paintings on canvas take YEARS to cure). So a day is nothing in comparison. 

Sunday will be a day of assembling the whole thing, then adding powders and sealing it all up. 

Then onto the base.....