Showing posts with label Hair Spray. Show all posts

Tuesday, August 1, 2017

Nemo 4.0

This one is slowly coming along. Tonight I was able to put a bit of time in on the face, hair, and metals.

The skin tones are coming along, I think I may have over did the highlights a bit, so I will have to go back and blend them in so that it becomes a smooth transition. Also looks like I need to add higher highlights on the hair based on the pictures it looks to be blending in. Aside from that I'm really happy with how the metals are turning out. The P3 pig iron on the screws looks really good with the rust. I still need to highlight up and blend into black in spots. The rust and metal mix looks better than I had imagined it would at this stage.

So yea lots more to do before school starts back up in a few weeks.


Wednesday, February 24, 2016

In the home stretch...

I was able to spend a few hours working on the Rhino and other GW tank last night. Basically I finished up the weathering and then sealed it with a matte varnish (to keep the pigments in place).

The weathering beyond the chipping is pretty easy to do. First thing is to gloss coat after the chipping stage is done. This basically puts a barrier between anything and the hairspray that is still under the paint. Once the gloss coat cured it was time to add the wash. For this model I went with Red Ochre oil paints mixed into a wash by adding mineral spirits. The oil needed over night to dry. Then I used Secret Weapons Miniatures - Rust Red weathering powder to give it a good rusted, dirty look. Then sealed it with matte varnish. The thing to remember about pigments is that they will always darken a bit after being varnished.

So here are the tanks. Now to just finish up the turrets and weapons and this one will be done.


Sunday, February 21, 2016

GW Rhino 3.0

Wow, I can't believe it's been over a week since I have been able to post any work updates. Darn life has been getting in the way of painting time.....

Thank goodness I was able to get a few hours in tonight! In picking up where I left off. I finished up the slivers on the tank treads and all the fiddly bits, and tried a new technique on the smoke stacks. I was looking at pictures of exhaust pipes and thought about how they typically go from silver to gold to blue I wanted to give it shot on the model. I already had the base gold laid down, so I took a new paint in my collection P3 - Blighted Gold and used it as a transition to the top of the stacks. Then I mixed a blue and black acrylic was together for the uppermost part and I really like how it turned out. Then it was time to add a bit more weathering to the model. The first step is the oil wash. I used W&N Red Ocher and applied it liberally to the model. Once this is dry it will be time to go with a good rust colored weathering powder and this one will be in the books.

So here is a bad picture of the progress so far.

Sunday, February 14, 2016

GW Rhino 2.0

I got a bit more work done on the tanks last night. I worked on getting the rust effects looking right. I used the hairspray method as mentioned in the last post. Once that was done I sealed the model with Tester's Gloss Coat. then it was time to work on the Golds and Silvers. The golds are Vallejo  Alcohol based - Red Gold, and the silver is P3 - Pig Iron. Pig Iron has been my favorite silver since the old GW - Chain Mail went by the way side. It has similar dark tones to it which makes it a great base for highlighting, it also has amazing coverage.

So here are a few pics to keep you satisfied. I also need to fix the line between the purple and white. As you can see in the picture I got a bit of bleed over when using water to activate the hairspray underneath the paint.


Thursday, February 11, 2016

GW models you say? 

Yep, I figured I'd mix it up a bit and work on some Games Workshop stuff. 

So this is a tank (I think a Rhino?). I am told that this is a Chaos model so it's going to be all rusted out and nasty looking. 

I started with an undercoat of brown/red/orange mix. Once that was dry I hit it with a good coat of Tester's Gloss Coat to seal in the freshness.... Well OK to facilitate the next step in the process. Once the gloss varnish had time (overnight) to cure I then applied a coating of hair spray. I use Aqua Net as its really cheap and water soluble. 


Then it was time to add the main colors of the tank. I was going for a split color of white and purple. This step is critical. You need just enough paint to cover the browns, without saturating the hairspray. to do this I turned up the PSI on the airbrush and shot from a bit further away than normal (about 6 inches) so that the paint was just about dry by the time it hit the model. 

I started with the white coat of paint. waited for it to dry completely, then masked off the center with painters tape. It was then time to use the purple. 

I let everything dry overnight again (nobody said this is a quick process). 

And it was then time to activate the hairspray and chip some paint. Doing this is fairly easy. Get a fresh cup of water, a paintbrush and something to chip the paint with. I personally use a straw that has been cut on the bias. It's sharp enough to chip up the paint, but not so sharp that it will cut through the varnish. 

Here are the steps for the rust chipping. 
1. take your paintbrush and get it good and wet.
2. "paint" the water onto the section you want to chip.
3. wait about 30 second for the water to get under the paint to the hairspray.
4. chip the paint gently with the tool of your choice. 
5. when you are satisfied with the level of rust. dry off the area with a clean paper towel. 

After the chipping is done it was time to seal the model with another layer of Gloss Varnish. 

And you get something like this. 


Once the Varnish cures it will be time to work on details, washes, powders and all the fun stuff to ruin a perfectly good paint job!


Wednesday, September 30, 2015

The Galleon had a run in with gravity. 

So my beautiful, wonderful, amazing, understanding (you get the picture) wife. Took the Galleon out of my display case to show it off to a friend. Sadly gravity ensued. I was able to get it back into one piece with minimal damage to the paint job. Pinning had really helped in this instance as the glue gave way at the pin points making it fairly easy to clear off the old glue and put it all back together. 

I figured while I had it out I might as well get some good pictures of the model as all I had before where pictures I had taken with my iPhone back in the day. 

So here are the old pics followed by the new. 


Friday, April 24, 2015

GW Models for a change.

Well I finally got to working on some 40k models for a friend.

I had been putting these off for a while, but today inspiration struck. I wanted something flashy that will work well in contrast. These are undercoated in an almost neon green bordering on yellow. I am using a kinda modified hairspray technique to get a crackled paint look. I am really digging the purple and green together.

This one should get pretty interesting. I am thinking that any silvers will have to be very very dark, almost like the dark bluing you would see on real rifles. And for the golds I will be using Vallejo Red gold to give it a good dark look. Stay tuned this one is gonna be fun.


Tuesday, April 7, 2015

Competition Model 4.0 - The Shining.....

So I was able to finish the golds, brasses, silvers etc on the model today. Now its just about time to start rusting it out, adding the pigments and oil washes and making it look like its been to hell and back. The base from Secret Weapons Miniatures shipped out yesterday so hopefully it will be here before the end of the week and I can have this model wrapped up and ready to go this weekend.

So here are a bunch of photos of what the model looks like before I ruin a perfectly good paint job.

Please let me know what you think.


Saturday, April 4, 2015

Competition 3.0 aka Photo Dump.

I got a good amount of painting done today. I was able to get the silvers and most of the brass and golds on the model. I still need to work on the face's grill and then the final darker silvers of the hands, sword and gun barrel. Then..... muhahaha it will be time to ruin a perfectly good model.

The silver so far is Vallejo Model Air - Aluminum.
The Golds have been
P3 Rhulic Gold
Vallejo Model Color Brass
Vallejo Metallic Alcohol Based Old Gold

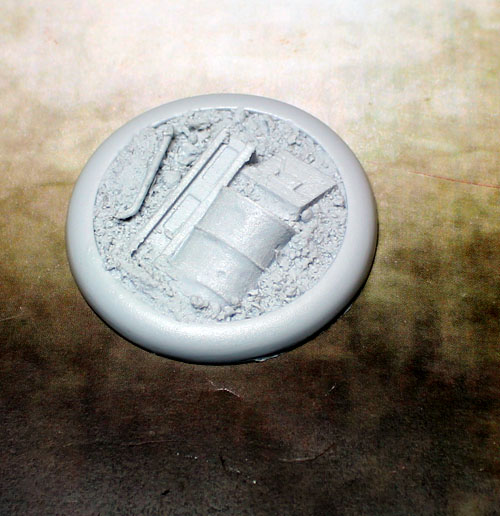
It's also time to start thinking about basing.... I chose the Secret Weapons Miniatures line for this. For PP models I usually use the Trench Line but for this one I went with something new. I am going to try they Scrap Yard base. I feel like it will work well with the style I am looking for on this model. So hopefully it will be here this next week.

Here is what it looks like from the SWM website.

Here is a link if you want to buy stuff from Mr Justin (you should, his stuff rocks). 


So yea.......Here have a metric crap ton of pics.


Friday, April 3, 2015

Contest Model 2.0

So today I did a bit of rage painting.

What is rage painting you ask? Well PTSD is a bitch. I was at the point of rage where I needed to remove myself from all of mankind and what better place to go then where I can focus my energy into something productive then the painting table. (I wonder if I can get the VA to pay for my hobby as "Therapy"?

Anywho.... I got some work done on Rocinante. This is the model that I am painting up for a competition based on the theme of Veteran. The idea is to have something that looks like its been there, done that and survived to tell about it. The model is going to be rusted, dirtied, and made downright nasty with battle damage.... But first I have to make it look good before the destruction can occur.

I started by laying the undecoat of browns into reds and up to orange. The base of brown I used is Vallejo Game Color - Beasty Brown. It is a bit lighter than I would normally go for a rust effect but the green I am going to use on the model is very light and it should give a good contrast. After that dried I added a bit of Vallejo Game Color - Gory Red in a 4:2 mix with the Brown. Then moved to a 4:2 ratio of the mix and Old GW - Bright Orange (its a bit more red then most orange out there).


Once the paint was dry it was time to protect the rust layer. This is what we will be chipping down to so we need a good layer of varnish over it so that we don't accidentally go all the way down to the grey plastic when we chip the paint later down the road. I used Tamiya Gloss Varnish because its the best I've found and its tough as nails when dry.

I gave it an hour to cure (worked on some other models I'm not ready to show yet (patience grasshoppers).

Once the Gloss was dry and good to go. I grabbed the Aqua-Net hair spray. This step is key. Use really cheap hairspray. The good stuff is bad for what we want. The hair spray is water soluble so once we are ready to chip we use a bit of water and watch how it dissolves the  hairspray under the paint letting us get a good natural chipping to occur.

Then it was time to start laying down the actual paint layers that will cover the model.

I wanted to keep with the overall feel of the Mercs Faction but did not want to go with a darker green. I used Vallejo Model Color - Russian WWII green and it looks fantastic so far.


Well that's about it for now.

Next up will be to add the silver and golds, but that's another blog entry.

Please leave some feedback. Any suggestions for basing would be greatly helpful.