Showing posts with label Retribution.. Show all posts

Wednesday, October 28, 2015

Retribution of Scyrah Battle Box Part 2.

Check me out.... I actually got two nights of painting into the same week. Still avoiding my Khador Red so work continues on the angry elves.

I started by blocking in everything that is going to be silver (any shade of silver) with black. I used P3 Thamarite Black is its a fantastic matte black that goes on really smooth. Once that was good and dry it was time to add the silvers. for most everything from the smoke stacks to the weapons I used good old P3-Pig Iron. On the Arc-node I used Vallejo Model Air - Chrome to give it an super shine and to pick it out from the rest.  The silvers will be given a good slathering of P3 - Armour wash which is a very light blue wash that really gives a good hint of older iron.  After that it will be onto the golds and a surprise or two.

Anyway.... Have some pics.


Monday, October 26, 2015

And now for something completely different.

As much as I would like to have my Khador fully painted before Warmachine Weekend. I am kinda burnt out on painting that much red.

I've had the Retribution Battle Box sitting around for a while so I figured it's time to get this painted up and on its way. The tradition Retribution paint scheme is this strange white and blue that honestly looks horrible. I figure that they are really just a bunch of angry elves and elves are traditionally green and brown. So naturally I went with green.

I am using the same ink technique I have been showing on the Khador jacks, just this time with a green ink instead. I did find out that the green ink is a bit more opaque than the red, which is a bit strange as they are the same brand, but hey that's how life goes sometimes.

I was able to get to the second highlight followed by the send ink to smooth the blends and now the models are waiting for the first gloss coat to dry so I can keep on keeping on.

With out further ado...... Have some pictures.


Friday, May 23, 2014

Retribution Battle Box 1.0

I first want to apologize for how long it has been since I updated last. I would like to give you at least 2 updates a week, but sometimes life just gets in the way.

OK now that they humbling is out of the way lets get down to why we are here. Painting and pictures (well that's why I am here anyway).

So I have been working on the PP Retribution Battle Box. It was given to me used and already "Primed" two were black which looked to me like GW Chaos Black and one was coated in some white stuff.. A soak in Simple Green and the two Chaos Black models were ready to go. The white though....... Oh the white one. Not sure what the stuff is but its just not budging. So everything was washed and dried and a nice light coat of Vallejo Grey Surface Primer was applied using the Badger Patriot 105. The color scheme for the clients Ret is the same as Hyperion in the "black" Silver, Red.

Lets get to the pictures shall we? Here is the Big war jack. I don't know its name but its big broad and this is the one that was covered in the white stuff.

More to follow soon.


Wednesday, April 30, 2014

Ret Cav 1.0

The Hyperion was dropped off tonight and the client was very happy. So happy in fact that I now have some more shiny models to paint up for him. I am going to be working on the Ret Cav unit and eViros (the Ret Cav Warcaster). Over the next several weeks. The paint scheme on these is going to be "black" armor and the swirl things will be a really rich red, with a touch of silver to round it out. Not sure what I am going to do with the bases yet but hey that's part of the adventure right?

So have a few shiny, bare metal pics.


Monday, April 28, 2014

Hyperion Finished.

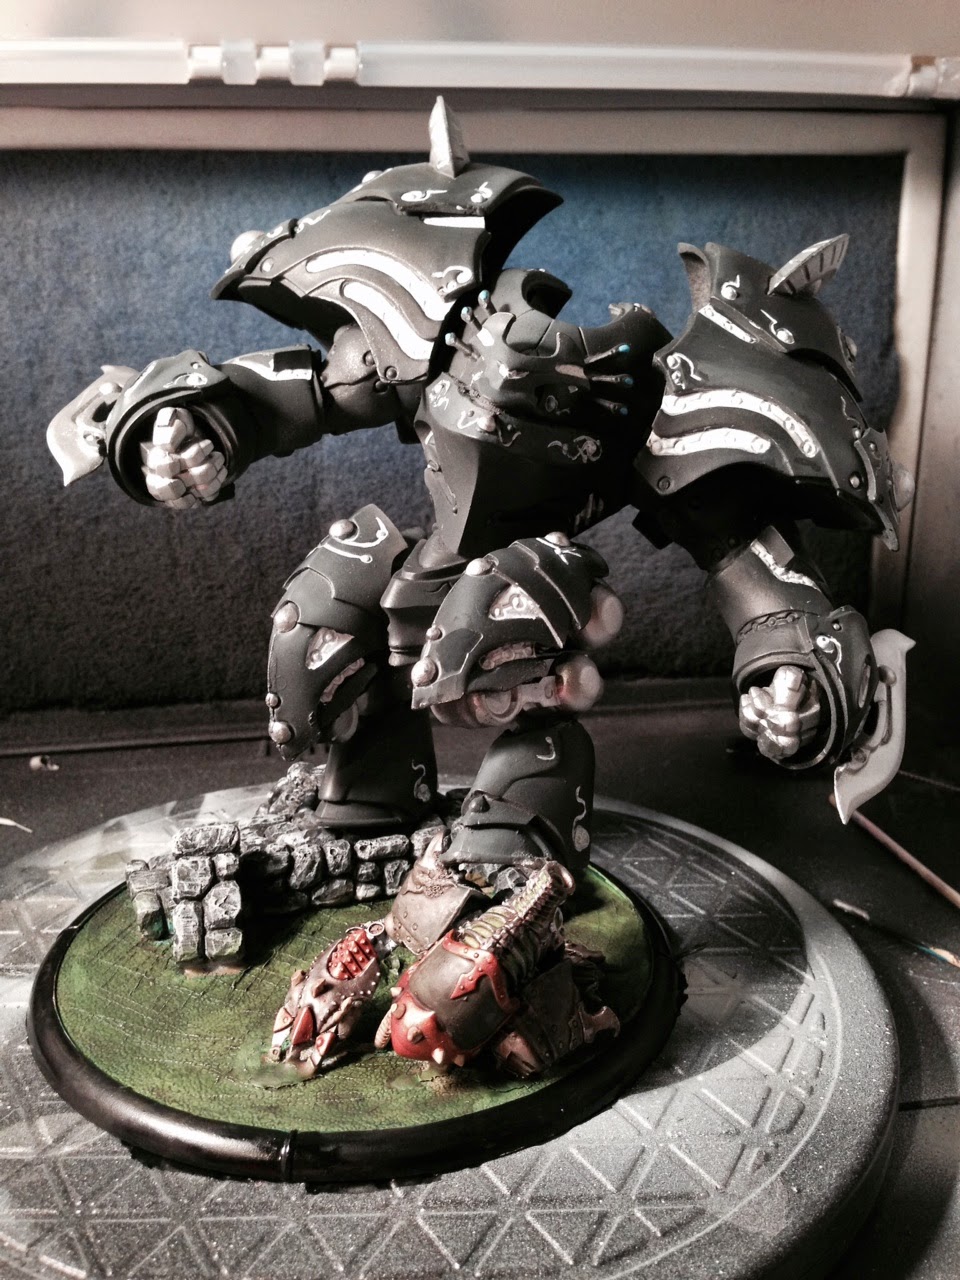
Well its finally done. I think this one turned out pretty well. I would have preferred a different color scheme but its not my model so its all good. 

I learned a few things on this paint job. First and foremost if you are going to mix custom colors WRITE DOWN what you did. Its a pain in the rear to try to recreate a color from scratch. Second, ask for models not to be assembled prior to giving them to you. Lots of weird angles on this one to work around. 

So whats next? I am going to finish up my pAlexia and the risen than another Hyperion for the same guy. 

Here have some pics. 


Saturday, April 26, 2014

Hyperion 6.0 - So very very close to being finished.

Oh yea. I was able to sit down for a few hours today and knock out just about everything that needed to be done on this project. I was able to get the gloss coat on and add the reds (I honestly think that an electric blue would have looked better but hey its not my money). I was able to get all the silvers finished up and cleaned up the spots around the white.

The base is looking pretty darn good. For my own models I use Secret Weapons Miniatures resin bases. This one came on what the owner wants so I got to make it up as I went along.  My understanding of the Iron Kingdoms (PP fluff world) is that they really don't care too much about pollution or other junk like that so I went with a dirty nasty look. I added Secret Weapons Real Water to make it a more realistic water base. The Real Water will take about 24 hours to cure and there will be some shrinking as it drys so tomorrow I will have to add just a bit more and it will be done. Well it will be done after a satin coat of varnish.....


Thursday, April 24, 2014

Hyperion 5.0

The end is in sight. I was able to finish up all the white (and holly cow is there a ton of tiny little places that the white goes). I was also able to get the Seether on the base done. and the final color on the base that will be under the water effect is where I want it. I added the Electric Blue to the front spike thingies and also on a few places where it would go on the back. Then fixed the outside rim of the base in black to give it a really good contrast. So yea 4 hours of work tonight really shows.

Now the model is sitting in my spray booth drying. Next up will be a gloss coat on the whole model to seal in the freshness then I will be adding a bright bright red to all the raised circles inside the white. After that the water effects will be added to the base and blam another model will be done.

Have some pictures (their free).


Wednesday, April 23, 2014

Hyperion 4.0

I finally had a day off that I wasn't sick or recovering from a 24hr shift (ah the life of a paramedic).

So I did the most of the white coats down on the model and its starting to look the way the client envisioned it. a few more lines of white, then the reds and the top will be done.


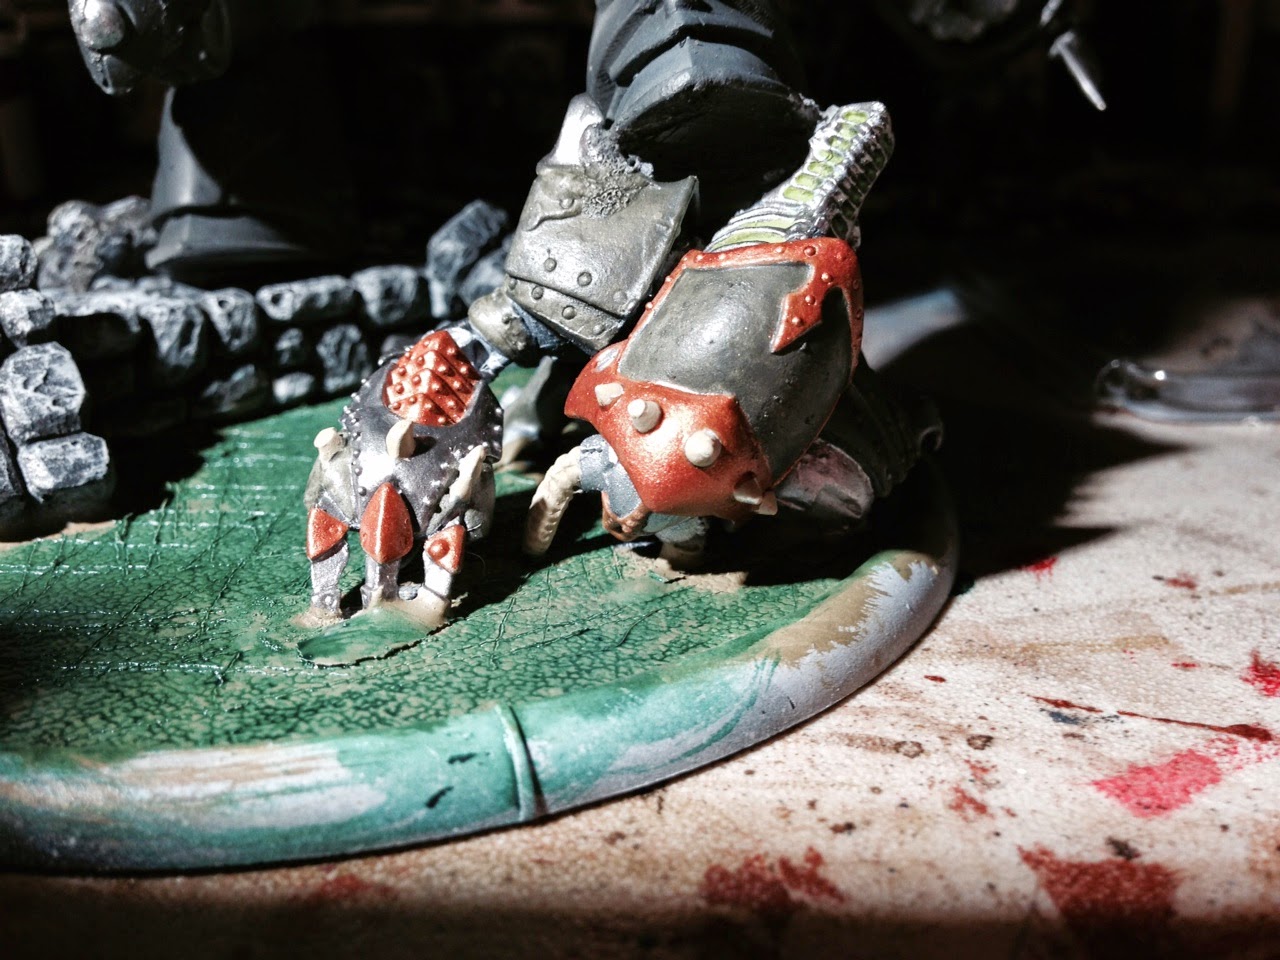
So I was a bit burnt out on white and decided it was time to work on getting the base ready. The client already had this put together and wants it to look like the Hyperion had just crushed the Seether.

I am thinking of something off the pier so naturally we need to get the base ready for some water effects. I use Secret Weapons Miniatures "Still Water" it works well and I got 5 bottles on sale online. I got a base coat of a nasty brown/ tan mix and hit it with a green ink. When thats dry tomorrow I will add a blue ink then drybrush some greens and browns in as well.

I started painting up the Seether and figure the Hyperion is very sleek and almost monochromatic (with the dark grey, white and red) so I want to add some color in somewhere. The Seether is P3 Bane green and will have P3 Necrotic Green, with old GW Gun Metal, VMA Aluminum and P3 Jack Bone. The brass is Tamiya Alcohol based old brass.


So there in a few pictures are the 3 hours of my life.

Till next time......

Sunday, April 13, 2014

Hyperion 3.0

I was able to start on the recesses that are going to be bright white. I started lightening with Vallejo Game Color Stone Grey. It is a good base color for white and has great coverage to help block out the dark grey/green. I will have to add another coat of this before working my way to actual white.

Once the white is where I want it. There will be bright red on all the circles inside the white. I hope to give it an almost red glow.

So here are a few pics to tide you over till next time.


Sunday, April 6, 2014

Hyperion 2.0

Well folks it's been about 24 hours since the primer was put on. I was able to get a good base coat down using Vallejo Model Color Dark Grey mixed with Reaper Pale Flesh and Vallejo Game Color Black. I used a mix of 6:2:2 and this gave me a very nice dark grey with a hint of green. Then the highlights I added a bit more of the Pale Flesh and got a very nice grey/green highlight.

As a quick aside, people please don't use strait black for painting your models black. Use a dark grey and highlight up on the light spots and then use shades, or inks, or washes to make the recesses very dark. It looks better and gives much needed depth to the model.

Now to let this all dry over night so that when its time for taping off tomorrow I won't pull up any paint with the tape. So here are some pics for your viewing pleasure.


Saturday, April 5, 2014

Hyperion 1.0

So I went up to the FLGS to enjoy Table Top day with 3 out of 4 of my kids.
When all of a sudden a wild commission appeared. Our local Retribution player had scene my Galleon (see earlier posts) and wanted me to due up his Hyperion in the same standard.

So here we are he looks to be in pretty rough shape I have a few areas to cleanup and a few pieces to glue back on. It is pretty much just primed and no detail was obscured so I was able to just start with a very very light coat of grey primer to get it ready to paint. This should be a relatively fast job as its going to be silver and black with red for the lighting and OSL. The base is already put together and just needs some painting. Yes there is a Slayer under his foot.....

Here is some before and after primer pics to wet the pallet.


Here he is all primed.