Diorama 7.75
To answer your first question, Yes my numbering system is completely arbitrary.
OK, that out of the way. I was actually able to sit down for a few hours and paint! Behemoth's matte varnish had dried over night and so the hair brushing could now begin.
I used Vallejo Game Color - Black, and yes you are correct I have repeatedly said to not use strait black on your models. Always go a shade lighter. You are correct, however the black in this case is needed and will be highlighted up to the point of not really even noticing it was strait black to start with.
Then it was on to the metallic colors. The silver is Vallejo Model Air Chrome. I wanted the silver to be really bright and shiny so when it is knocked down with a wash or two it still has a bit of a gleam to it.
The brass..... Oh the brass. I started out with Vallejo Game Air Brassy Brass and I am honestly disappointed in it. The coverage is still fantastic but it is way to brown. I mixed it with about 2:1 Vallejo Model Color - Brass and it gave me a good mid-tone brass. Then it was time for a quick wash. I used Vallejo Game Color - Sepia Wash as a first wash to bring down the silver and brass.
Now to let it dry. and then it will be time to work on details like highlighting the black, adding battle damage and washing it again.
So here have some pictures.
Friday, January 30, 2015
Labels:
28mm,
30mm,
Airbrushing,
Badger Airbrush,
Diorama,
Game Air,
Gaming Table. Wargaming,
Inks,
Miniatures,
PP,
Privateer Press,
Table Top Games.,
Vallejo,
Vallejo Game Air,
Warjack. Khador,
Warmachine
Wednesday, January 28, 2015
Diorama - 7.5
We last left off at the over highlighting and it already was starting to look rich with a good depth of color.
I went to the Hobby Lobby yesterday and got some artists inks. I grabbed the FW stuff that is made for ink pens an airbrushing. It comes in a decent sized glass bottle with a glass dropper built into the cap. How cool and old timey is that?
When I pulled some out to put into the airbrush I noticed some stark differences right away to the P3 ink. This stuff is much thinner and more vibrant. I tested shooting it through the airbrush at 10psi and had to turn it down to about 5psi to get it to shoot without spidering.
I laid a very, very light coat down over the flesh tones and man it just looks amazing. The model is drying right now. I hope to get to at least varnish it again tonight so that I can finish this up on Friday and move on to the next model.
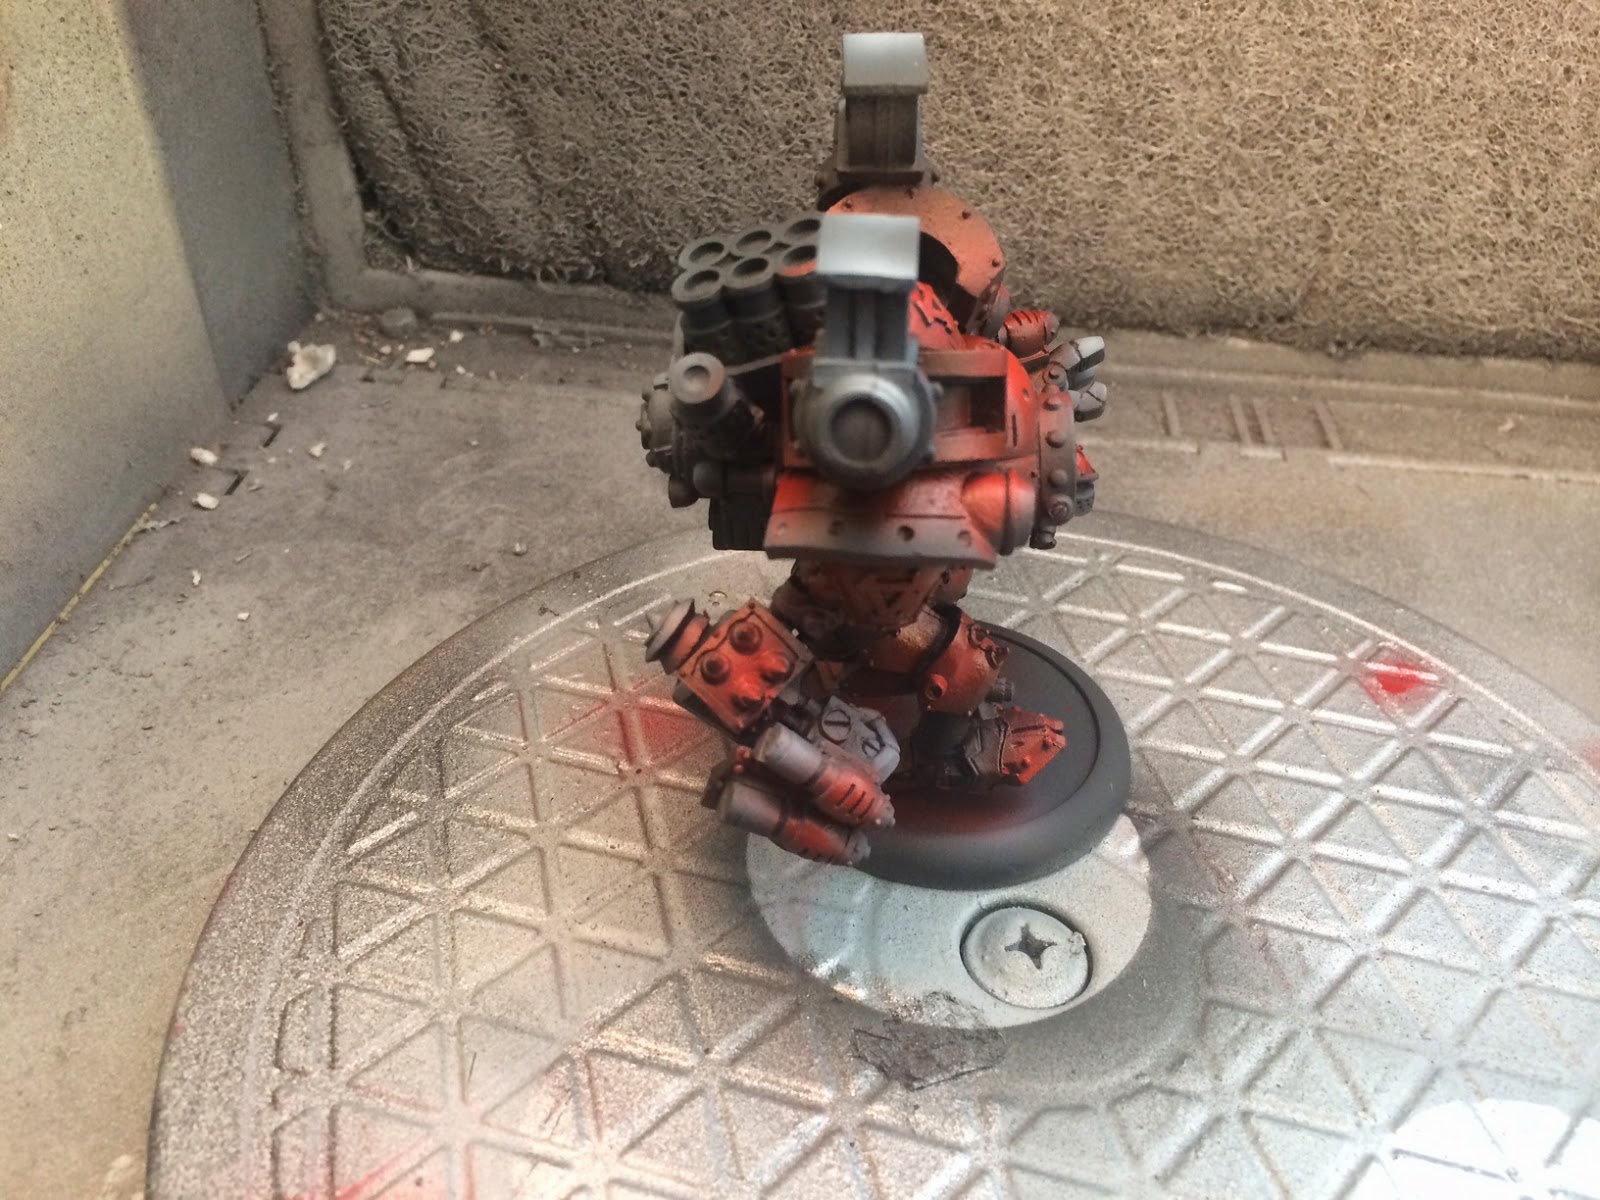
Take a look at how its turning out so far.
We last left off at the over highlighting and it already was starting to look rich with a good depth of color.
I went to the Hobby Lobby yesterday and got some artists inks. I grabbed the FW stuff that is made for ink pens an airbrushing. It comes in a decent sized glass bottle with a glass dropper built into the cap. How cool and old timey is that?
When I pulled some out to put into the airbrush I noticed some stark differences right away to the P3 ink. This stuff is much thinner and more vibrant. I tested shooting it through the airbrush at 10psi and had to turn it down to about 5psi to get it to shoot without spidering.
I laid a very, very light coat down over the flesh tones and man it just looks amazing. The model is drying right now. I hope to get to at least varnish it again tonight so that I can finish this up on Friday and move on to the next model.
Take a look at how its turning out so far.
Diorama 7.0 - The Highlights.... Oh the Highlights.
I had a few minutes after class (so read about 10pm last night) to work on this model a bit more. I was able to add the second highlight (well first over color). I used Vallejo Model Color - Light Skin Tone mixed at 1:2 with water, and very slowly applied the highlight to the raised areas. I can honestly say I am just astounded at how well this technique works. The depth of color is just insane (I think I said that after the last coat too but man it's true).
To give you an idea, there is no direct light on this model. the "shine" is all paint.
Up next will be a very light coat of red ink to smooth out the highlights and then its on to the blacks, golds, silvers etc.....
I had a few minutes after class (so read about 10pm last night) to work on this model a bit more. I was able to add the second highlight (well first over color). I used Vallejo Model Color - Light Skin Tone mixed at 1:2 with water, and very slowly applied the highlight to the raised areas. I can honestly say I am just astounded at how well this technique works. The depth of color is just insane (I think I said that after the last coat too but man it's true).
To give you an idea, there is no direct light on this model. the "shine" is all paint.
Up next will be a very light coat of red ink to smooth out the highlights and then its on to the blacks, golds, silvers etc.....
Labels:
28mm,
30mm,
Airbrush,
Airbrushing,
Awesome Paint Job,
Badger Airbrush,
Diorama,
Gaming Table. Wargaming,
Inks,
PP,
Privateer Press,
Table Top Games.,
Warjack. Khador,
Warmachine
Monday, January 26, 2015
Diorama 6.0 - Behemoth!
I have watched Les over at Awesome Paint Job paint this model and I found his technique amazing. using inks to create a fantastic depth of color on the model. I decided that if I am going to do this thing I am going to do it right and use every trick I have learned to produce the absolute best models I can.
I started with Vallejo Grey Surface Primer and after curing I used Vallejo Model Color Dark Grey as my base color. I then used Vallejo Game Color Stone Grey for the highlights on the model.
I have watched Les over at Awesome Paint Job paint this model and I found his technique amazing. using inks to create a fantastic depth of color on the model. I decided that if I am going to do this thing I am going to do it right and use every trick I have learned to produce the absolute best models I can.
I started with Vallejo Grey Surface Primer and after curing I used Vallejo Model Color Dark Grey as my base color. I then used Vallejo Game Color Stone Grey for the highlights on the model.
Then it was time to play with the Ink. I only have P3 red ink at my disposal right now. I played with it through my Badger Krome given that it has a very small needle (0.2mm) and I can shoot it at a much lower psi. I found that 10psi was the "sweet spot". I used about a 1:1 mix of P3 Red Ink and Vallejo Airbrush Thinner. The depth of color after just one coat of red ink is already astounding.
I've just coated it with a Tamiya Matte Varnish and once dry I will start the second layer of highlights using a soft skin tone.
Stay tuned I have a feeling this will be the best model I have ever produced.
Sunday, January 25, 2015
Diorama 5.0. If a tree gets Greens Stuffed in the forest.....
Ok bad joke opening aside. I finally had a few moments between work, school, and kids to get just about an hour of hobby time in today.
I wanted to get the Tree sculpted at least. I mixed up some GS and basically just wrapped up the twisted pairs of wire in as thin of a coat of GS as possible. Some places I made a bit thicker to try and simulate knots and stuff like that. This is my first time trying anything like this and I don't think it came out half bad.
Not to let it dry and then paint it up real quick and be done with this part.
Ok bad joke opening aside. I finally had a few moments between work, school, and kids to get just about an hour of hobby time in today.
I wanted to get the Tree sculpted at least. I mixed up some GS and basically just wrapped up the twisted pairs of wire in as thin of a coat of GS as possible. Some places I made a bit thicker to try and simulate knots and stuff like that. This is my first time trying anything like this and I don't think it came out half bad.
Not to let it dry and then paint it up real quick and be done with this part.
Wednesday, January 21, 2015
Diorama 4.0 - Happy Little Tree
I really want a tree on this diorama I think the landscape is a bit too barren. I looked around at Hobby Lobby and on the internet to find something but all the pre-made stuff just looked "wrong" I want a tree that looks like its stood through hell. Off to the forums and the YouTube I went. I found a tutorial on trees made with twisting wires together and I knew that this was the way to go for me.
I grabbed some 1mm brass rod from Hobby Lobby. It comes in packs of 6, 12" rods for $2.39. so under $5 which is much much less then something from Woodland Scenic's.
The technique is incredibly simple.
Here is the supply list.
15 same length rods
Pliers
Nail Clippers (or what ever you use to cut brass rod).
A base of some sort (I used a 30mm round)
Wood Putty/ Green Stuff etc.
Start by cutting your rods to even lengths and make sure you have about 15. In pairs (2) grab one of both with the pliers and start twisting till you have something that looks like this.
Once you have your pairs done, take one pair and twist it together with another. Keep adding a pair till you get the desired girth of your tree. Keep in mind that you are going to add an outer layer that will make it even bigger when all is said and done. Also you will want to create the branches out of the ends of the pairs. I did this by not twisting the entire length of the pairs together starting with the third set. It should give you something like this.
Once the green stuff is dry I will take wood putty and finish it up.
I really want a tree on this diorama I think the landscape is a bit too barren. I looked around at Hobby Lobby and on the internet to find something but all the pre-made stuff just looked "wrong" I want a tree that looks like its stood through hell. Off to the forums and the YouTube I went. I found a tutorial on trees made with twisting wires together and I knew that this was the way to go for me.
I grabbed some 1mm brass rod from Hobby Lobby. It comes in packs of 6, 12" rods for $2.39. so under $5 which is much much less then something from Woodland Scenic's.
The technique is incredibly simple.
Here is the supply list.
15 same length rods
Pliers
Nail Clippers (or what ever you use to cut brass rod).
A base of some sort (I used a 30mm round)
Wood Putty/ Green Stuff etc.
Start by cutting your rods to even lengths and make sure you have about 15. In pairs (2) grab one of both with the pliers and start twisting till you have something that looks like this.
Once you have your pairs done, take one pair and twist it together with another. Keep adding a pair till you get the desired girth of your tree. Keep in mind that you are going to add an outer layer that will make it even bigger when all is said and done. Also you will want to create the branches out of the ends of the pairs. I did this by not twisting the entire length of the pairs together starting with the third set. It should give you something like this.
I then made up some green stuff and secured the skeleton on the tree to the base.
You can see here that I bent the tree in the middle to give it a bit of a gnarled look.
Tuesday, January 20, 2015
Diorama 3.0
Let's talk models for this bad boy.
So the terrain part is just about done. I still have to make a gnarled old tree which I am going to do with twisted brass rods (that will be it's own post later). It's time to think about the models that are going to be added into the scene. If you notice there are 4 small base holes on one side of the sandbag wall, and on the other side are a medium and large base hole as well. The 4 smaller holes will be for a few Cygnar models I have already painted and don't have a use for. The large base holder is for Khador's Behemoth. I had already owned and painted one but had to sell it some time back for lack of rent fund. So it was with some joy that I got a new one. Then I rememberd having to put the 2lbs of white metal together..... I also picked up pButcher because really if your gonna do something like this you need a big bad model to really drive it home.
Here are the modes in their very early WIP form. Both were primed with Vallejo Grey Surface Primer and allowed to cure over night. Then Behemoth was base coated in a mix of Vallejo Model Color Grey - Black with two drops of Wych Purple (old GW paint).
Let's talk models for this bad boy.
So the terrain part is just about done. I still have to make a gnarled old tree which I am going to do with twisted brass rods (that will be it's own post later). It's time to think about the models that are going to be added into the scene. If you notice there are 4 small base holes on one side of the sandbag wall, and on the other side are a medium and large base hole as well. The 4 smaller holes will be for a few Cygnar models I have already painted and don't have a use for. The large base holder is for Khador's Behemoth. I had already owned and painted one but had to sell it some time back for lack of rent fund. So it was with some joy that I got a new one. Then I rememberd having to put the 2lbs of white metal together..... I also picked up pButcher because really if your gonna do something like this you need a big bad model to really drive it home.
Here are the modes in their very early WIP form. Both were primed with Vallejo Grey Surface Primer and allowed to cure over night. Then Behemoth was base coated in a mix of Vallejo Model Color Grey - Black with two drops of Wych Purple (old GW paint).
I also started adding a bit of water effect in some of the holes on the diorama base as well.
Next up will be to make and add the tree in, add some powders to give it a more gritty feel, and possible some static grass here an there for color.
Paint up the models and BLAM.....science...
The next blog post will be back to the GW Vindicator and Predator.
See ya'll soon.
Labels:
28mm,
30mm,
Airbrush,
Airbrushing,
Badger Airbrush,
Cygnar,
Diorama,
Gaming Table. Wargaming,
GW,
Miniatures,
P3,
Patriot 105,
Pigments,
Poor Broke disabled Vet.,
Table Top Games.,
Vallejo,
Warjack. Khador,
Warmachine
Subscribe to:
Posts (Atom)