A quick side stroll over to Terrain.
I have always loved looking at game tables full of fantastic terrain. Whether home made or store bought. It really does pull a table together and helps immerse us in our games. I get tired of seeing green felt cutouts count as "forest" etc.
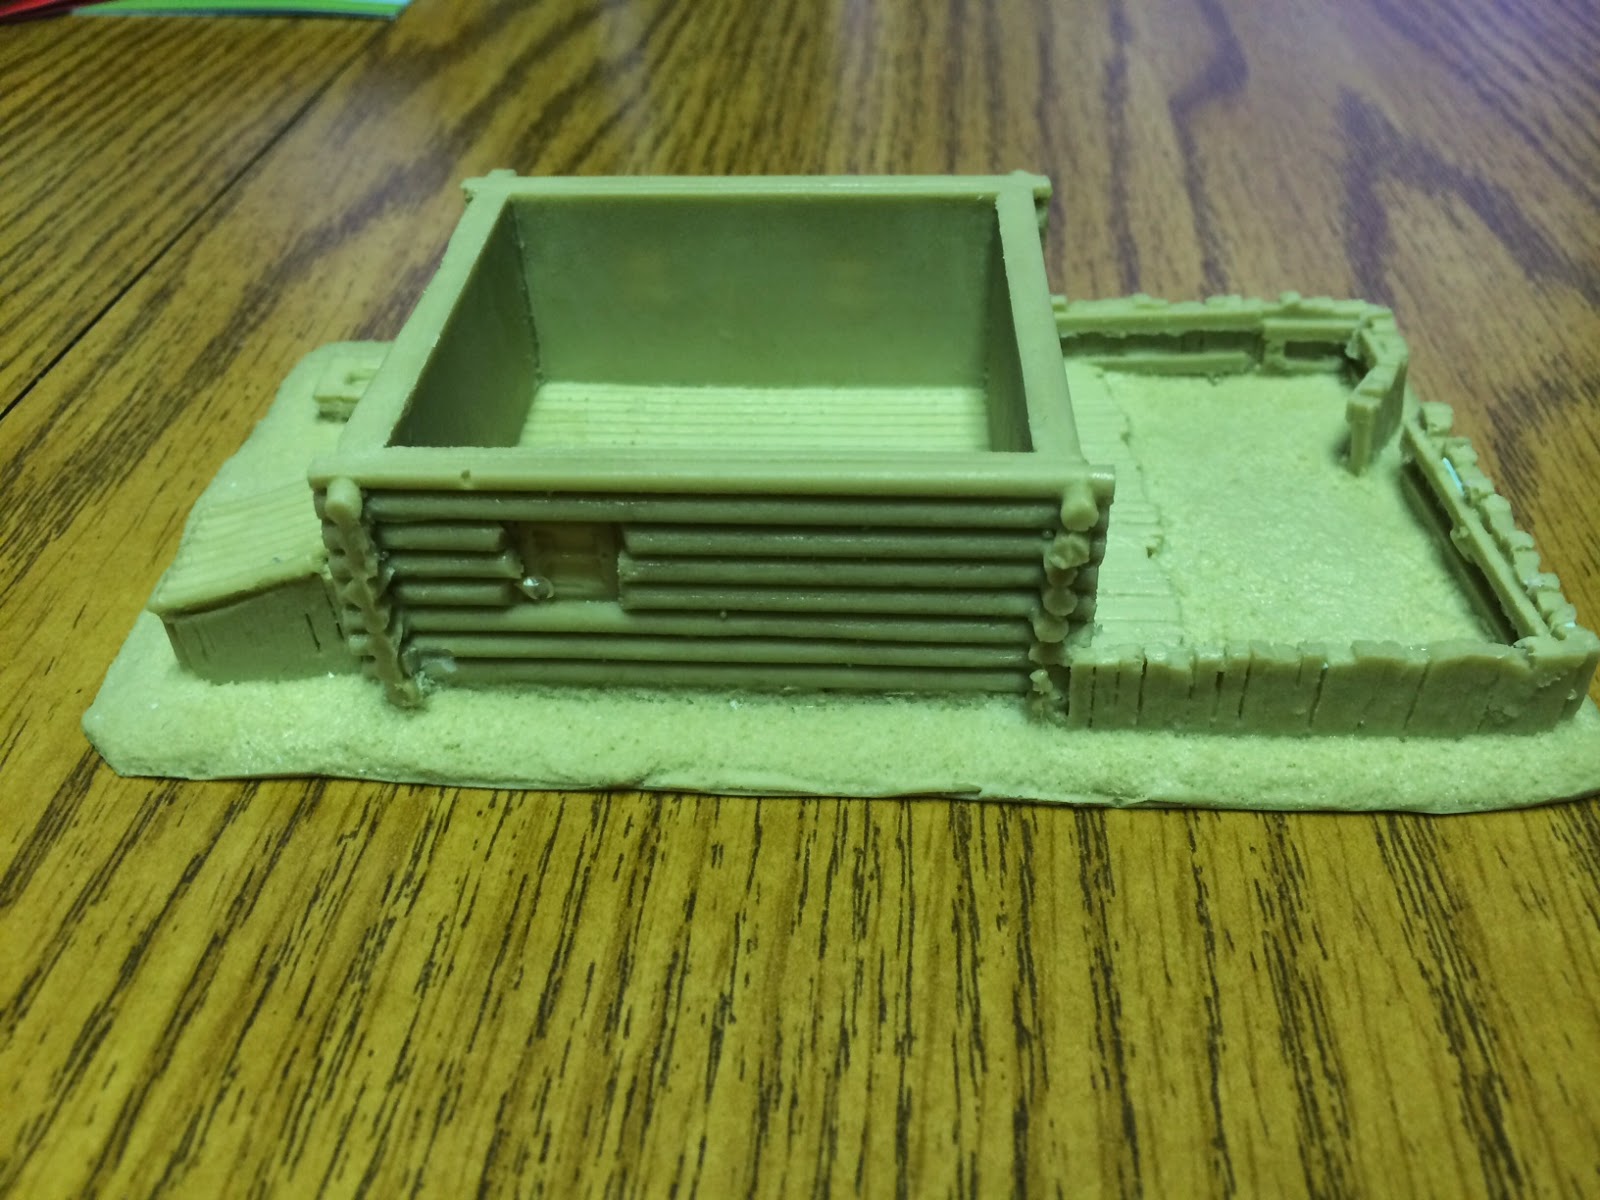
I had the chance to grab a peasant house that was made of resin from Novus Design Studios.
It came from Miniature Market and had a bit of credit in my PayPal so this wound up costing me about $3 out of pocket. My first mistake was not looking at the scale. I could have sworn it was for 28mm but its 15mm. Not a big deal as it will still be fun to paint and will look good in the display case.
Here is where things are starting to go off the rails.
Bubbles! I understand that resin can have bubbles. I get its a pain if you don't get it just right. But seriously? Bubbles on the sides. On the tops. In the middle of the gate?!? Please if you work for or know anyone at Novus, please ask them to review quality control. I don't mind bubbles on the underside of things, but come on man.
The other issue that I have is it appears that the resin was not fully cured. The resin is "slick", even after letting the piece take a nice long soak in warm soapy water and scrubbing with a brush.
We shall see how it reacts after drying when I try to prime it.
So overall its a really nice design and I can't wait to paint it up. I just hope that the little farm house is salvageable.
Oh and here are the rest of the pics.
Saturday, May 9, 2015
Tuesday, May 5, 2015
Someone got a new camera!
Let's talk cameras. For a while now I have been using my iPhone to take the pictures you have been looking at on this blog. I have tried everything I knew how to do to make them the best pictures I could produce given what I had. I used a light box with good lighting. I would crop and adjust white levels as best I could and the results were just ok. Better then some but not anywhere near amazing.
My wife's uncle came to visit and he is a photographer, and in a stroke of generosity I was given one of his older cameras. I now find in my possession a Cannon Rebel T2i (if anyone cares can be found here Canon Rebel T2i).
Here is what the setup looks like now for shooting pictures.
I now have the equipment to take amazing photos. I just have to figure out how! I am also playing with Adobe Light Box and I might even dabble into Photo Shop.
So stay tuned as I work out the bugs and hopefully deliver much better content (picture-wise anyway). If anyone reading this has any advice/resources to offer I am all ears and would eternally grateful.
Until next time.
Let's talk cameras. For a while now I have been using my iPhone to take the pictures you have been looking at on this blog. I have tried everything I knew how to do to make them the best pictures I could produce given what I had. I used a light box with good lighting. I would crop and adjust white levels as best I could and the results were just ok. Better then some but not anywhere near amazing.
My wife's uncle came to visit and he is a photographer, and in a stroke of generosity I was given one of his older cameras. I now find in my possession a Cannon Rebel T2i (if anyone cares can be found here Canon Rebel T2i).
Here is what the setup looks like now for shooting pictures.
Yes I just took a picture of my camera, How existential is that?
I now have the equipment to take amazing photos. I just have to figure out how! I am also playing with Adobe Light Box and I might even dabble into Photo Shop.
So stay tuned as I work out the bugs and hopefully deliver much better content (picture-wise anyway). If anyone reading this has any advice/resources to offer I am all ears and would eternally grateful.
Until next time.
Labels:
Adobe,
Canon,
EOS,
Inspiration,
Miniatures,
Rebel,
T2i
Saturday, May 2, 2015
Thagrosh Painter of Everblight 2.0
I was able to work on this today. I started with a 5:1 mix of VMC -Dead White and VGC - Stone Grey. This was laid down as the base skin color. I need something whitish that will hold the blue and then purple inks later in the painting process.
After that dried it was time to add the red glow/gore on the torso. I used FW Red ink and shot it through the airbrush at about 5psi.
Then added on P3 Jack Bone for the spikes and nails.
The cape... ah the cape. I used the Jack Bone for the skulls then P3 Blood Tracker Brown, P3 Beast Hide, and another paint that I didn't right down and can't remember for the browns on the cape. Now to let it dry and then I'll start the blending on the cape to really bring out the highlights.
While everything was drying I started working on the base. The stone is drybrushed in stages from black grey up to stone gray. Then I used VMC - Russian Green as the base color and went up to Neon Green to give it a bit of texture. I poured the Still Water in and now that will cure overnight.
Ah yes past the wall of text and now for the pictures.
Monday, April 27, 2015
Thagrosh the Painter. 1.0
First off, this model is cool, very very cool. This is a convention exclusive from Privateer Press. They took a Warlock, took away his sword and gave him a paintbrush. Then for fun and excitement they put a tiny little Khador Juggernaut in his hand!
Here is what the Privateer Press cover photo looks like.
I was asked to paint this model and really how could I say no.
I got the model prepped and pinned the resin pieces (legs and cape) were pretty rough with mold lines and vent ports.
Then it was time to prime. As big and detailed as this model is it makes more sense to paint the pieces then put it together. You'll notice in the pictures that the torso has a bunch of pins, a few of these are just to keep the holes clear and adds an additional place to hold the model while painting.
Ok enough of me, have some pictures.
Friday, April 24, 2015
GW Models for a change.
Well I finally got to working on some 40k models for a friend.
I had been putting these off for a while, but today inspiration struck. I wanted something flashy that will work well in contrast. These are undercoated in an almost neon green bordering on yellow. I am using a kinda modified hairspray technique to get a crackled paint look. I am really digging the purple and green together.
This one should get pretty interesting. I am thinking that any silvers will have to be very very dark, almost like the dark bluing you would see on real rifles. And for the golds I will be using Vallejo Red gold to give it a good dark look. Stay tuned this one is gonna be fun.
Thursday, April 23, 2015
Warning! - Another Fraudulent Commission Painting Business - Battle Grounds Wargaming.
This "Company" is based out of Brampton, Canada. They have been taking in peoples models and money. Apparently this has been going on for months. so much so that frustrated clients have taken to forums in the hopes of shedding some public light on the issue.
To make matters worse the owner of this company has joined the forum and began arguing with the customers. One in particular has asked multiple times to have his models returned, not returned with money spent. Just wants his models back. This has not happened. Another customer traded in a GW High Elves army for a painted GW Spaces wolves army. The customer after months received an unpainted Space Wolves army and was told that the High Elves had been sold and could not be returned. No refund was offered but a "painting credit" was given..
When confronted on these issues the owner is now threatening to declare bankruptcy and let everyone else's models just go away (meaning he gets to keep them).
Here is a direct post from the Owner
"I can really careless. I was being nice before to show my sympathy. Like I said this business name means nothing. This business cost me nothing to start and another on will cost me nothing to start. I've explained to everyone in personal detail through email. There is nothing more I can say. So either take your models or be patient and let me paint to them."
So please place an order with this company at your own risk.
Here is the thread if you wish to read it
Dakka Thread
Monday, April 20, 2015
Model Tray - A Review of a new product.
Dragon's Lair Accessories was kind enough to send me the first of a kind new tournament tray. For those of you not familiar with such things, tournaments are crazy and stuffed with people and moving your army's from table to table can be a chore. Tournament trays have been hitting the scene for a few years now and there are several big name places selling them in the $80+ range. DLA is looking to break into the market and are much better priced. DLA has gone with real wood, and I like that. Other companies offer trays in both wood and acrylic (acrylic can be laser etched and personalized more readily. etc).
Here are a few pics of the DLA tray so you know what I am referring to.
So how does the DLA tray compare?
The good:
1. Its big and pretty darn light considering its wood. (when metal models are added this becomes a big factor).
2. I really like the long front piece that can hold, dice, cards, tape measure etc.
3. Interchangeable slots so that you can change your configuration based on army composition.
4. It's very sturdy and well put together.
5. Slots are well drilled and plenty deep to keep models in place when on the tray.
The could be better.
The needs improvement list:
1. While the wood is stained it could use a varnish coat. It is still rough (I will do this myself to seal it this weekend).
2. The interchangeable slots are too easy to pop out from the bottom, which could lead to spilled over models and nobody wants that. (I am going to add a few magnets to the corners of the board and the parts and see how that does.
So what's my final take on them? I think they are pretty darn good deal for the money he is asking. A few kinks to work out but then what new product doesn't have a few?
If you are looking for a tray and wan't to support the little guy jump over to DLA store and give him some business. (link is in the name at the beginning of this post).
Subscribe to:
Comments (Atom)