Showing posts with label Warmachine. Show all posts

Sunday, October 1, 2017

Well Borka is finally done!

I had a rare few hours today to actually get some painting done. I know it was strange being able to sit down, clear my mind, clean my brushes and actually paint!.

I'd love to give you my normal breakdown on what paints I used/mixed to get the colors I did. I honestly didn't take the time to write them down. I will say that I broke out the Scale 75 paints to do the leathers. This is the first time I've used them, and I am happy to report that the do live up to the hype.


So with out further ado....... I give you Borka!


Sunday, August 27, 2017

Borka Kegslayer.

Well Privateer Press did it again. Another fantastic bust came out at Gen Con. This time a Troll Blood. Well I've never actually painted a troll so I figured why not? It's a bust, it's a troll, it seems like a really fun sculpt..... and Bob's yer uncle!


For those unfamiliar with the Bust here is the box art.


The resin is the normal PP stuff, its hell to remove mold lines from with anything other than file rods (those awesome things from Tamiya).  There was a good bit of flash and vent resin left over on this one. 


Sadly There was also a bit of mold slip, which I apparently did not manage to get a picture of... and a few small bubbles on the back of the head behind the quills (which will fill in just fine with primer).

I did set a pin in the shoulder for the armor, more out of habit than anything else. Ok to be honest I started drilling before thinking....


Well now it's all primed up and ready to get going. Just gotta wait for the primer to cure.

Saturday, August 5, 2017

Nemo 5.0

Well It was more work time on the Nemo bust. I continued to work on the skin, more and more glazing to get the shading and highlighting right. I'm happy with where the skin tone is now. I tried something different and funky with the eyes on this one. I went all "Storm" and tried to get a glow from the eyes, like there was some kind of magic happening. I'm not sure if I like it or not, so we shall see if it stays of if I blow it out and redo it normally.

Other than that, highlights were added to the golds, the purple and the silvers. a bit of wash was applied strategically on the armor. and well here are the pics.


Friday, July 21, 2017

Nemo part 3.

Well things are moving along with this bust. I'm still happily surprised with how smooth and almost easy it is to paint this thing. The lines are just nice and crisp, the edges are defined well. I kinda wish everything was as nice to paint as this one.

With that all out of the way, lets get down to some painting.

I started by grabbing the silly putty to mask off the face. I used a sculpting tool to push the putty away from the face and into the crevasses so that I had a clear shot to the face with the airbrush. It's almost funny how much it looks like a shroud.


After that I used Reaper Masters Series Olive Drab as the base color for the skin tone. Then moved on to a glaze of Reaper Masters Series Tanned Flesh. After that dried I hit it with the Tanned Flesh Highlight (again watered down to a glaze). 


Up next will be to darken the shaded parts of the face and bring up the highlights a bit more, but that's all for the next installment. 


Thursday, July 6, 2017

Nemo update 1.

Well this guy is coming along nicely. I decided that the end goal is going to look as though Nemo has seen some better days. With that in mind I started out with a rust under coat. I'll be using the hair spray technique on this one. I feel that it gives a real feel with depth to the rust and pitting in the armor.


Here you can see that I started with a base brown and worked up different spots to almost an orange. It's important to vary the colors of your browns as it is both visually stimulating and mimics what rust actually looks like.

Next up was a heavy layer of gloss varnish. This is important. It needs to be heavy to protect the rust layer for whats to come down the road.

After the varnish had time to cure (about 8 hours) It was time to coat the model in hair spray. As I've said time and again, you must use the cheap stuff. Aqua Net all the way. Don't go and steal your significant others (or even your own) fancy smells good stuff. We need the cheap stuff that almost instantly activates when wet.

I let the hairspray dry overnight. While it does not require anywhere near that long to dry I was tires and hit the sack.

Next up it was time to base coat. The standard paint job for this sculpt and pretty much all Cygnar is blue..... I am not going blue. It's just boring to me. I wanted an almost yellowish green look for this one and started with a nice base coat. One thing to keep in mind is that the hairspray will activate with water. So when working over it you must keep moving your airbrush and build up the layers slowly. This takes time but it is worth it. With the base coat laid down It was time to apply the highlights. I basically took my base coat and added white till I was happy that there would be enough contrast and even help bring out a bit of shadow.


And not it's time to let everything dry. Next up will be paint chipping and weathering around the rust. 


Monday, July 3, 2017

General Adept Sebastian Nemo!

I think it's time to bring out this bad boy. This was the Gen Con bust that Privateer Press released last year. He's been sitting on the shelf a while. I've never done a bust from PP before, but having worked with plenty of their regular models I was a bit nervous to crack the box open. PP likes to use resin and PVC plastic. Anyone who has had the displeasure of working with PVC knows just how frustrating and time consuming it is to get mold lines and imperfections out of the material. You can't really use a hobby knife as the stuff forms long strands and gets really weak and likes to peal like an apple. Using a metal file is a no go as the stuff likes to shred. I have found that the Tamia (sic?) file sticks work well on PVC but take a while to get it filed down right.

So after all of that I opened the box.


I was quite surprised at just how clean the model was right out of the gate. 


You can see that there is very little to clean up on the front side. Just a bit of flash right under the lower belly. 


On the back between the shoulders was a vent that needed to be cut off and sanded down. Other than that there was a very slight mold line on the top of the coil sticking out above his head. 

The shoulder things are another matter. These had really bad mold lines on the under side. I can forgive this as its going to sit flush against the model (and do not really need to be added in any case). 


All in all this looks like it is going to be a really fun project to work on over the next few weeks.

As a side note. I'll be testing out the new SOTAR 2020 on this one. So bonus right? 

Saturday, July 1, 2017

The new Behemoth!

Well Privateer Press actually managed to really impress me with an updated version of a classic model. The old Behemoth was clunky and top heavy with tiny legs (think body builder who skips leg day). When the new model came out I was a bit skeptical of replacing my already bought and painted version, however fate intervened and my old model decided that even with pins it was time for the metal twigs it called legs to let go.

So here we are with the new and improved Big B. I love the way it protrudes bulk. They really nailed it on the head with the proportions and really looks menacing. When I think of a giant stompy robot in a steampunk setting this is most definitely what my mind goes to.

Without further ado I give you my version of the Behemoth (also scroll through the pics for a look at the old one).


And as mentioned above here is my old one. Please note this is before I had a light box or a real camera or really knew what I was doing when painting.


Sunday, February 19, 2017

Some much needed Red.

Hey there folks. I got a bit of time tonight to work on the bust. I was able to start on the red metallic of the shoulder armor. I started by masking off the skin with Silly Putty. That might sound weird but it's a fantastic way to mask, it does not leave any residue and is really easy to get into cracks and crevasse. More importantly it is easy to remove with no issues.

I started with Vallejo Model Air - Steel which is a bit bright for what I normally use but for this I want it to stick out a bit more before bringing it down with glazes later. Once that was dry I used P3 - Red ink and did a nice fine layer leaving most of the metallic shine.


Then it was time for the gloss coat to seal in the freshness.

I had a bit more time so I spent the next 2 hours building this guy. It's the latest large model for Khador from Privateer Press and is also totally in hard plastic on sprue. Which was nice but a heck of a lot of pieces for one large model.


Monday, October 31, 2016

Warmachine Weekend will be shortly upon us!

WMW is kinda my Christmas. It's the one convention I get to go to per year. It's small enough to not be completely overwhelming (under 1000 people) and big enough to have that con feel.

This year we have an amazing array of painters, modelers, airbrush artists and yours truly lined up to add a ton of value to the Hobby Lounge.

Not to mention the main gaming hall will be filled with games and at night the board games and booze will be a flowing. So if your in the St Louis area come on down and say high!

Oh and for those that want to know more. Here is the link to the con.

http://warmachineweekend.com/

Saturday, October 22, 2016

Nursing School blues.....

It's just not fun when there is no time to paint. So last night I made an executive decision and took an our out of my schedule to slap something onto a model. I wanted to actually finish something and found a single pose model that had a decent amount of detail that would be easy to do up real quick without spending hours on minutia.
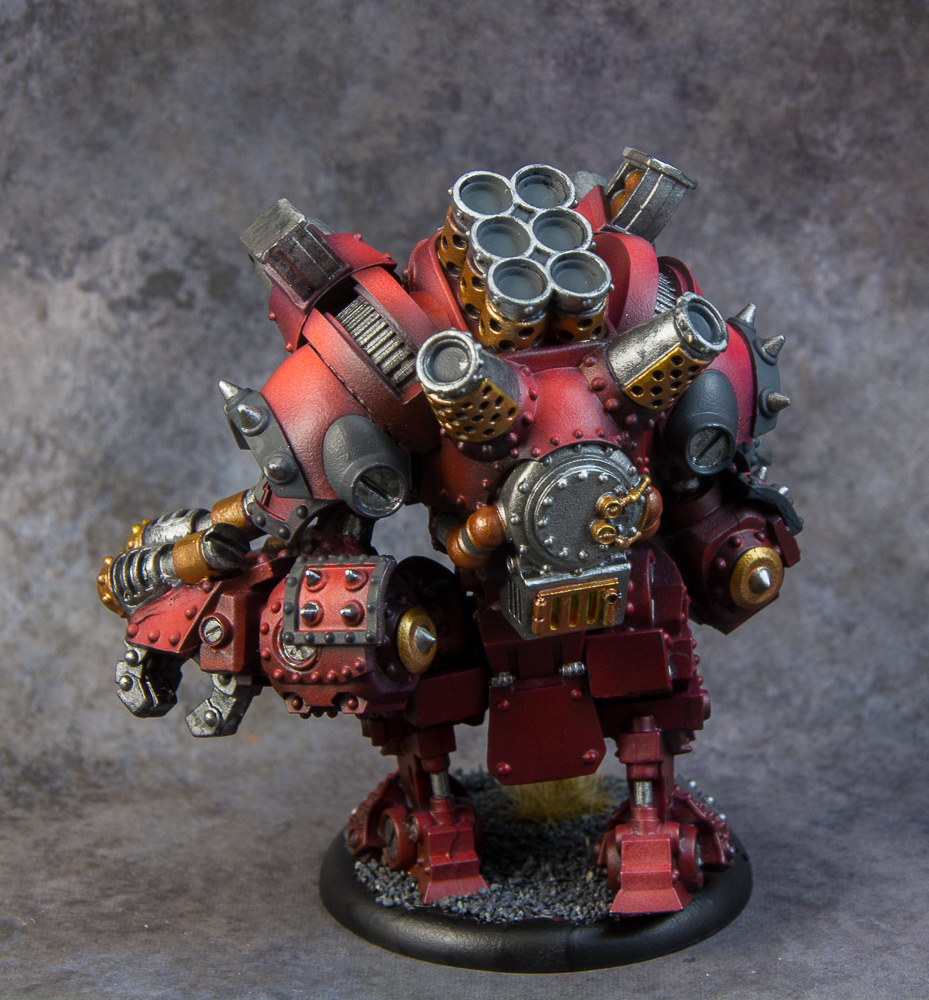
And with that I give you Kovnik Joseph, fondly referred to as Uncle Joe.


Saturday, October 1, 2016

The Death Stalker.

So this guy is just about done. All she really needs is a bit of building up under the foot on the base. It was a fun model to work with, and I got to try a new thing using a ton of different blues to create the hues I was going for.

So I'd type more words here, but I just finished a 20 page paper for school..... Just look at the pictures and stop judging me!