Monday, December 30, 2013

What a crazy last two weeks it has been!

I live in the godforsaken state of Michigan right now. And we had this wee little ice storm. 

I lost power the Saturday before last and just got it back on yesterday!

So as I move the family back into the house. I believe it is time to start thinking about painting again. 

First thing I am going to have to do is see if a 9 days of below freezing temperatures has ruined my paints. 

Anyone ever had an issue with this? 

So next week I should be back to normal and posting crappy pictures of decently painted models. 

Till then lets all just pray the power stays on. 

Keep warm out there. 

Thursday, December 19, 2013

Well hello good people of the internet I am still deciding on what to work on next. I think its going to wind up being a single 28mm figure probably the Mercenaries War Caster Broadsides Bart, or maybe Damiano.

So while I play eeny, meeny, miney, mo. I cleaned up my painting table and got most of my stuff organized. I used Vallejo and P3 mostly which makes having just one solution for paint storage nearly impossible.

I found a solution that I really like. I found The Iron Bow on Etsy.com, He has some great laser cut wooden paint racks I got this one for my Vallejo and Reaper dropper bottles and a large stand one for my P3. The larger one also has the bonus of paint brush storage. Sadly as of typing out this entry the larger pot version is no-longer being sold on his site.

The assembly was pretty easy on these and even though they are laser cut MDF they are quite sturdy.

So hats off to Kelly at The Iron Bow, If you need paint storage go check out his stuff (no I am not a paid or sponsored sales person, just passing on what I found).

If you're anything like me you tend to have paints all over the place by the time you are done painting something and I find that this helps greatly, also helps you keep tabs on what you have and what you need. Don't be like me 3 years ago and buy the same bright orange 3 times in 3 trips to the store because you cant keep your paints strait.

So yea that's my rambling about paint storage.

Here is a picture of the Dropper Bottle Storage


And this is the one that I use for the P3 pots.


Now you know, and knowing is the half the battle......

Wednesday, December 11, 2013

Well now that the Galleon is done it's time to work on a new project. Only problem is I don't really know what to work on next.

Should I go Warcaster, Jack, or a unit?

So help me out good folks and vote for one in the comments.

I am your humble puppet, make me work for your entertainment.

Monday, December 9, 2013

It's done! It's finally done. After all this time the Galleon is finished and I gotta say I think it is by far the best model I have ever completed.

So no more words here it is in all its "glory"


Sunday, December 1, 2013

Second update in two days.... Things are getting crazy around here.

So I was able to get the oil wash on the Galleon. The first coat of brown weathering powders was added, and black oxide has been applied to the silver on the smoke stacks to knock the shine down and give it a good dirty feel. I still have a few more layers of powders to add and the model will finally be done.

Oh and he is finally on his real base.


Friday, November 29, 2013

Yay Progress!

Finally had some time to sit down with the Galleon. He looked lost and alone sitting next to my painting table. Poor little guy was just begging to be played with.

So I was able to finish painting him. and started ruining his perfectly good paint job.

First things first, I grabbed an old toothbrush (Spider Man in fact. Don't judge me). I then applied a liberal amount of water to the areas to start loosening the hair spray under the paint.  Working in sections lets you control how wet and how much paint comes up. When it looks good to you, blot it dry with a paper towel so that more water doesn't seep in and weaken the paint any further.

Now he is all assembled and drying so that I can apply a heavy dusting of weathering powders this will let me blend everything together. After that he gets a gloss coat to seal all the juices in...er I mean seal the paint job and fix the weathering. Then on to the oil washes and viola the Galleon will be done.

The chrome is still really shiny but that will get fixed with the washes.

Enough talk, here are a few pretty pictures.


Thursday, November 21, 2013

Quick update time.

My new Badger Patriot 105 came in the mail today! So very happy until I went to put it to work and realized I had the wrong darn connector. So I am happy and sad all at the same time. So off to Michael's I go later to get the right stuff. Pictures of the new spray and how awesome I hope it will be soon. For now here is the unboxing.


Sunday, November 17, 2013

Update time.

So my new shiny Badger Patriot 105 is on the way from Chicago Airbrush as I type this.

I am incredibly excited to get airbrushing again, and I kinda feel like a real boy now that I have a Badger airbrush.

So where to start? What do you want to see me use as a first model with this thing?

I have a few choices for you so let me know.

1. Troll Bloods Battle Box

2. Merc Jacks
 a - Nomad
 b- Buccaneer
 c - Rocinante

I can't hardly wait.

In the meantime I am just about done with chipping and weathering the Galleon so I should have final post and lots of pictures up next week.

Wednesday, November 13, 2013

And.... We are back for another exciting episode of.......No I haven't finished the Galleon yet. Yes I am aware its starting to sound like a joke/mythical creature.
In my defense I started a new job this week and for some reason they expect me to be there all the time.

So what have I gotten done you ask? Well I managed to finish another commission piece for a friend (payed for models get done faster).

This is the Cygnar Thunderhead. It reminds me of a DJ for some reason.

The Thunderhead was a lot of fun. I got to try a new technique with a brown oil wash. I had meant to try this out sooner on other models but this is the first one that I had finished that would look good with brown.

The base is my favorite part. Its from Secret Weapons Miniatures and its just a fun base. It almost looks like  the model is ready to jump in (well to me anyway). The base is awesome because I got to play with rust pigments and realistic water all in the same place.


So let me know what you think!

Friday, November 8, 2013

I had to diverge from what I wanted to do last night. I was planning on getting Galleon finished, but a friend "needed" a model done quick and was willing to pay.

So I worked on pStryker and it came out well for the 4 hours I had available to put into him.

On a cool note, this was the first time I got to try making an oil wash and I love it. It is everything everyone said it would be, smooth, flows into the recesses like a boss, and easy to cleanup and control on the model.

So here is pStryker.


Wednesday, November 6, 2013

Another few days have gone by and I still haven't finished up the Galleon. I know, I know, I'm a bad man, and should feel bad.... But hey life gets in the way sometimes.

Today I want to talk about why I started airbrushing, and things that come up on the big boards all the time.

I started because I wanted to bring my painting to the next level. I wanted to be able to paint more stuff, better and faster.

The airbrush allows me to lay down base coats in a fraction of the time, gives me smooth even coats and transitions and highlights are just unreal.

The more I learn to use the gun the more I fall in love with it.

So for anyone thinking about jumping in. Here is what you need (if I forget anything feel free to chime in).

1. An airbrush (duh) they range from $20 - $400+. Do some research and find one or two that fit your needs. Right now I am using a Master G22 that I got for $39.00 and it works well. I am saving up for a Badger Krome so we will see how much more I love that when I finally have one.

2. Air Compressor. Again these range from $50-$400+. I have a Harbor Freight desktop version and it works well, its quiet and steady and cost $80.

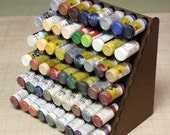
3. Paint. This is a whole blog post or ten all by its self.

4. Airbrush Cleaner. Some type of solvent lots of companies make them and there are tons of tutorials out there on how to make your own. I use Vallejo Airbrush Cleaner and dilute it 1:1 with water.

5. Airbrush Thinner. Again lots of companies make it, you can make your own.

6. Pipe Cleaners and Q-Tips. For cleaning your shiny new airbrush.

7. Spray Booth. Just bite the bullet and get one, they come in at $70 from TCP Global and its worth every penny.

Here are things that I use that are not needs but definitely help.

1. Small plastic cups for mixing. I use medicine cups and get them on amazon they are $4 for 100.

2. Gloves. The plastic ones, for holding your models when you spray.

3. Respirator. For protection when shooting anything more than acrylics.

4. Gater clips and Cork, this gives you something to hold on to so you are not touching the model its self while spraying.


Well I hope that helps.

Till next time.


Thursday, October 31, 2013

Where does your inspiration come from?

As I am finishing up the Galleon (pictures will be posted tonight, I promise).
I was thinking about inspiration. As in what makes me want to paint a model the colors I choose. Why did I pose it a certain way? What technique do I want to try next?

I draw my ideas from so very many different places:

From the official studio paint schemes.

Amazing folks like Les at Awesome Paint Job- http://awesomepaintjob.blogspot.com/

Hugo at Ichiban Painting - http://www.youtube.com/user/ichibanpainting/about

Meg Maples who just left Privateer Press - http://arcanepaintworks.blogspot.com/

Shnauzer Face Mini's (amazing airbrush work)
http://www.youtube.com/user/SchnauzerFaceMinis

The list goes on and on.

My question is where do you draw your ideas from? What makes you excited to paint and try new things?


Tuesday, October 29, 2013

Who else had a crazy weekend?

I was down in Columbus, OH taking care of my real life job so not much got done. I did manage to do a bit of airbrushing yesterday though.

I swapped out my bent 0.2mm needle for the 0.3mm that came with the Masters G22. I can't wait to get back to 0.2. Its strange but that 0.1mm really makes a difference in how much control I feel I have and how big the spray pattern gets.

I grabbed two models that have been sitting on my desk that I had primed black about a month ago and figured I could get some bulk colors down.


I started with the Reaper Base Flesh Tone for the faces, and an amazing P3 Brown who's name escapes me right now.


A happy accident happened here you can see that the top of his coat is a lighter brown and that was from over spraying the flesh tone first.  On a side note, how cool is the Bart model, I love the pirate caption look to him and the detail is just outstanding.

Here we have Harlen Versh, amazing model and I love that he is going to be variations of brown for the most part. It will be fun blending and using different tones to make his details pop.


As far as the Galleon is concerned I have not forgotten or forsaken him. I am at the point of starting to chip his paint and weather him. That is going to be a rather lengthy blog post with lots and lots of pictures so I am taking my time and I want to get it right and all pretty for ya'll.

Well that's all for now folks, see you in a day or two!


Friday, October 25, 2013

Sad, sad news today. I went to the "studio" (and by studio I mean my basement) to get some painting done last night.

I thinned my paint, had the models ready to go, music was just right, the appropriate amount of beer was available...... It was all shaping up to be an awesome few hours of sending tiny little specs of paint through the air towards pewter and plastic. Alas as I pushed down and then pulled back on the trigger......Nothing came out.... 

Perplexed as I had cleaned my airbrush diligently after the last use. I began to trouble shoot. As I disassembled the thing I noticed that the needle tip was quite bent. I still have no idea when I did this, it must have been on re-insertion somehow, yet here I sit all dressed up with nowhere to go. 

So now I have a choice to make. I can buy a new needle for my Master G22. The needle would cost $18 with shipping (the brush only cost $30), I can get a needle, and start saving up for that Badger Krome I really want, or.......I can beg and plead for someone to step up and sponsor my little escapade into airbrushing.... (looking at you fine folks over at Badger). 

I will have more pictures of what I have been able to at least paint with a regular brush by tonight. 

Until next time. 

Oh and please leave a comment. Bueler, Bueler....

Wednesday, October 23, 2013

No new pictures to post today. I didn't have time last night to work on anything.

I do want to run down a few lessons I learned and thoughts that occurred to me when working on the Devastator.

1. Rusty brown does not contrast well with red..... Not sure how to remedy this other than to go with a very dark brown and maybe much lighter red?

2. Little jacks are a lot faster to paint up then a colossal (well duh right?)

3. What you use to scratch off the top layers of paint needs to be somewhat hard but not metal. I noticed a few spots where without trying very hard I removed the paint down to the grey plastic below.

4. I need to build a light box or better place to take pictures. Looking at what I posted you can see that the red paint on the floor of the spray booth was kind of blending with the model...

For tomorrow's post I will be back to finishing up the Galleon. I hope to finish the head and metallic piping on the main body.

So stay tuned....

Tuesday, October 22, 2013

Hair Spray 1.5.2 of 2....

I was blessed tonight as my amazing wife let me go down to my hobby cave and work some more on the Devastator.

First I finished up the metal bits and then it was time for the fun....aka ruining a perfectly good model

1. Here we get a wee bit of water and something sharp. I used a small piece of metal sprue that I happened to have on my painting table. I applied water to the area I wanted to remove the paint from then gently rubbed off the paint till I reached the brown below (this is why I used the gloss coat earlier).

The results look like this


2. From here it was time to add a bit of a wash onto the rust parts. I used Secret Weapons Miniatures Rust Brown pigments mixed with Isopropol Alcohol and just dabbed it on in spots to give it a bit of a richer look to the brown. I will repeat this process again later (after another gloss coat has dried).

3.  I added weathering powders to the smoke stack to get rid of the pretty bronze. I use Vallejo Iron Oxide pigment mixed into 90% Isopropol Alcohol and use it almost like a wash.

4. Time to think about a finished base for this little guy. I used a Secret Weapons Miniatures resin base from the Ruined City Streets line. I added some green paint with Real Water over top to give it a toxic sludge look in the recesses.


5. The model was glued down to its permanent home and the Gloss Coat has been applied.


Now it is time to let that dry over night. Tomorrow I will mix up an oil wash and apply it over the gloss coat and finish this bad boy!

Now for some sleep (cuz apparently that's a thing).

Monday, October 21, 2013

Hair Spray Part 1.5

I thought this would be a two part series of posts. Apparently my planning out a project is also a learning process.......

For today's post I made sure the hairspray was dry, then sprayed on the Red base coat using P3 Skorne Red, I used this instead of P3 Khador Red as I find the Khador to be a bit too orange for a base coat making it harder to highlight..


I let this coat dry while cleaning out the airbrush for the next color.

At this point I added the highlights using P3 Khador Red and Reaper Master Series Pail Flesh at a 6:2 ratio. I picked up the Pail Flesh tip from watching Les @ Awesome Paint Job. It works well with red and blends fantastically.


From here on out we have to sadly leave the airbrush and go to the painting desk.

I started adding metallic using P3 Pig Iron. I had debated using VMA Chrome but I wanted a more rugged look.


Up next will be finishing the metallic paint, adding golds and bronzes.


Hair Spray (1 of 2)

As I looked back at the first two posts, I realized that I had mentioned using the "Hair Spray" method but didn't actually describe what I meant.

Its a pretty basic idea, and hopefully it will turn out well.

I grabbed a model that was still in the box to walk through the steps.

1. Assemble your model (I am using the Khador Devastator from Privateer Press)


2. Prime and base coat in brown (darker the better to give it the first coat of what your rust will look like. I used Vallejo Game Color Beasty Brown, and then a 1:1 mix of Khador Red and Khador red highlight (which is pretty orange) to add a bit of extra color to some spots on the model.


3. After the paint is completely dry its time to put on the gloss coat. This will give a protective barrier to brown underneath (its also a great save point for future mistakes)

(look how shiny it is!)

4. Wait for the gloss coat to dry (this can take several hours). Now the fun, go grab the cheapest hairspray you can find. We're talking like 80's keep your hair perfectly still in a F3 tornado kinda hairspray. And give it a good coating.


5....Stay tuned for next time.

Oh and please leave a note. Let me know that someone is checking out the ravings of an Airbrush newb....

Thursday, October 17, 2013

Its time for an update!

I was able to get just about all of the silver done using VMA Aluminum. Not sure why but VMA Silver, Chrome, and Aluminum all look the same to me. I also added the base brown for the wooden crates and as an undercoat for the golds that will come later. And as an added bonus the base is done. I used the trench works base from Secret Weapons Miniatures.

So here are some pictures of the progress so far.


So leave a comment and let me know what you think.