Showing posts with label Rust. Show all posts

Thursday, July 6, 2017

Nemo update 1.

Well this guy is coming along nicely. I decided that the end goal is going to look as though Nemo has seen some better days. With that in mind I started out with a rust under coat. I'll be using the hair spray technique on this one. I feel that it gives a real feel with depth to the rust and pitting in the armor.


Here you can see that I started with a base brown and worked up different spots to almost an orange. It's important to vary the colors of your browns as it is both visually stimulating and mimics what rust actually looks like.

Next up was a heavy layer of gloss varnish. This is important. It needs to be heavy to protect the rust layer for whats to come down the road.

After the varnish had time to cure (about 8 hours) It was time to coat the model in hair spray. As I've said time and again, you must use the cheap stuff. Aqua Net all the way. Don't go and steal your significant others (or even your own) fancy smells good stuff. We need the cheap stuff that almost instantly activates when wet.

I let the hairspray dry overnight. While it does not require anywhere near that long to dry I was tires and hit the sack.

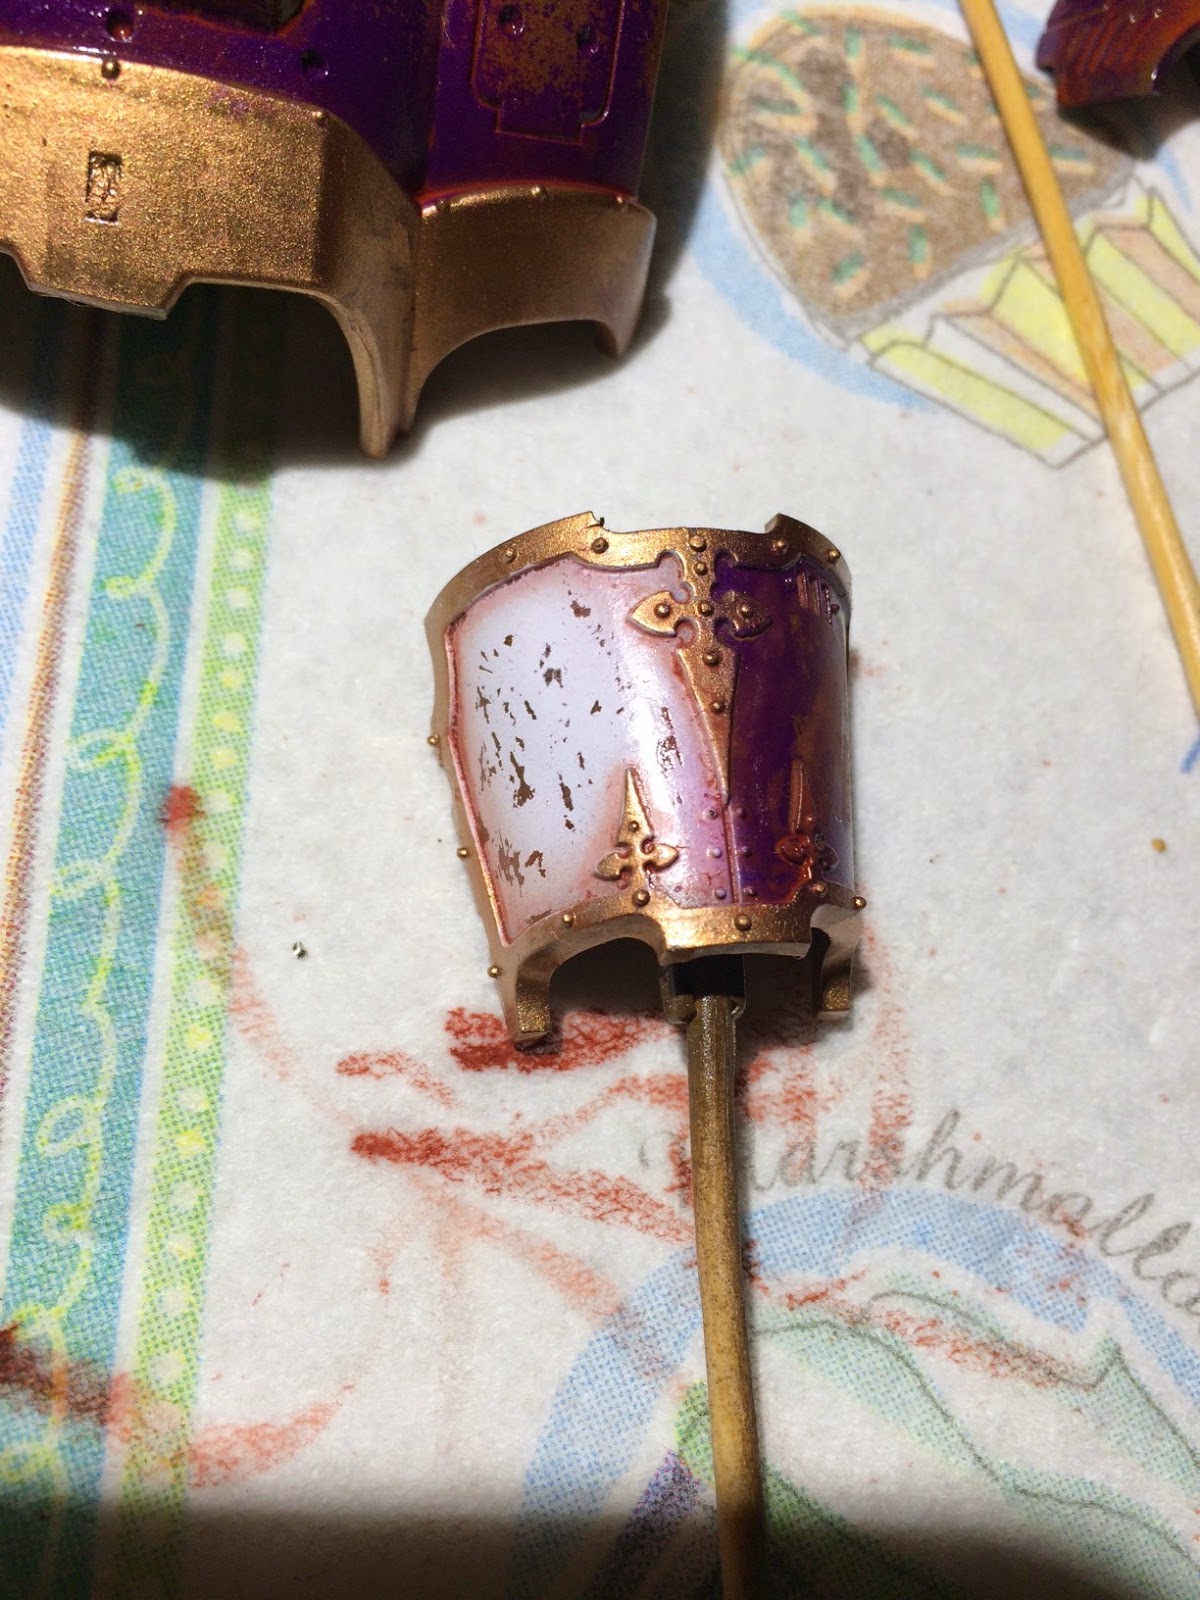
Next up it was time to base coat. The standard paint job for this sculpt and pretty much all Cygnar is blue..... I am not going blue. It's just boring to me. I wanted an almost yellowish green look for this one and started with a nice base coat. One thing to keep in mind is that the hairspray will activate with water. So when working over it you must keep moving your airbrush and build up the layers slowly. This takes time but it is worth it. With the base coat laid down It was time to apply the highlights. I basically took my base coat and added white till I was happy that there would be enough contrast and even help bring out a bit of shadow.


And not it's time to let everything dry. Next up will be paint chipping and weathering around the rust. 


Wednesday, July 27, 2016

Devastator Part 1.0

It's time to bust out ye olde rusting again. It's been a good long while and I figured why not give my self a challenge and go with a good dirty rusted out warjack. Not only good and rusty but lets assume that it was white at some point in it's carrier.

The devastator just seemed to fit the bill. It has good flat vertical lines and nice slopes to make run off and rust streaks look good.

So far i have gotten the basic rust chipping added. In my next post you will see the real magic....

so have a little taste.


Friday, April 10, 2015

Contest Model 6.0 - And Finished!

Rocinante is done and in the display case. This was a really fun model to work on. I love how PP Warjacks have largish but not overly so areas to work on. Just enough room to give good detail and do a few fun things with.

So where did we leave off.... Well after the gloss coat had time to dry. I was able to mix up a black oil wash and all the Silvers and golds were given a heavy wash to bring down the shine dramatically. Then I mixed an orange wash to add to the rust effect.

Once dried I applied some Secret Weapons Miniatures rust pigments across most of the model. It adds a bit of depth and also brings down the shine. I like doing this with the oil wash stage because it helps keep the pigments in place for the final matte varnish.

So here are some pictures. Please leave some feedback and let me know what you think!


Wednesday, September 24, 2014

Knight Titan Base 2.0 - the pouring of the water.

Well I had some free time this morning so I was able to get the base looking like rock. I used the airbrush to hit it with Vallejo Model Color Black Grey. Then proceed to add a bit of Vallejo Model Color Stone Grey in ever increasing amounts and dry brushed it on to give the rock some "depth". Once that was done it was time to start pouring the "water". I used Secret Weapons Miniatures Realistic Water (because I had a few bottles on hand). It will take several applications because you can only pour about 1/8" at a time.

So this will take a few days to build up all the way and spill over a bit.

But for now have some shiny new pictures.

Here is what it looked like after the dry brushing.

Here is the first pour.

Making sure it looks good on the base.

From the back. 

Looking down. 

And the wide shot for funnzies. 


Monday, September 22, 2014

Knight Titan 10.0

It's getting so close to being done. I can feel the excitement in the air. The last few touches and Blam something new and exciting has been finished. Ok, enough poetic waxing. I had planned to work on this last night but I was way to tired to even walk down to the basement let alone mess with a model. So today I was bright eyed and had enough beer on hand to give it a go.

I started by cracking open a 24oz PBR, then it was time to put the beast together.


It was at this point that I realized I had never actually finished the shoulders..... So off to the painting desk I went

30 minutes later....


What is not shown is the powders added to the whites of the shoulders as for some reason they would not chip.... Not cool shoulders but powders made it look better and another shot of oil wash will bring them in line with the rest of the model. 

I was also able to the the base primed so thats a thing. 


Friday, September 19, 2014

Knight Titan 9.0  - Oil, oil everywhere....

Well I got home after what was supposed to be a 24 hour shift that turned into 36 hours between both jobs (gotta keep them kids fed). I'm tired but really wanted to get some work done on the Titan.

I hit the parts with Testers Gloss Coat. It's the best thing out there when it comes to gloss coats and you want something very strong and durable when you are about to make an oil based wash so as not to eat the paint underneath.

I chose to go with a really orange oil wash on this one to highlight the rust. I want a brighter rust to contrast the purple and stand out. It also sets a good tone for the next step in the process....... Powders.

So I used this stuff.

I got it from Hobby Lobby with the 40% off coupon for something like $5. This is probably more than I and 10 friends could ever hope to use, but oils never dry out so its all good. 

I grabbed about a 2mm round balls worth of the stuff out and mixed it with Odorless Mineral Spirits to make the wash. I wish I could give you a ratio but I can't. How I do it is I mix it nice and thin to the point of some translucence, then blot it on a paper towel. If it spreads out in a nice spider pattern I know its good to go. 

I started applying the oil wash on the turtle top thing and let capillary action bring it down into all of the nooks and crannies (another bonus to gloss coat). 


You can see how the orange of the wash really brings out the browns of the rust already. 

Then it was onto the leg guards. Now with whites you have to be really careful as you cant just smear it all over and hope for the best. I applied it mostly around the edges and it will set up the powders better on these. 


Same thing with the white on the mask, but I did go with a heavier wash on the silver hear. 

Here is a shot of the legs and torso for good measure too. 


And now its time to wait for the oils to dry at least over night. Oils take a very long time to dry (oil paintings on canvas take YEARS to cure). So a day is nothing in comparison. 

Sunday will be a day of assembling the whole thing, then adding powders and sealing it all up. 

Then onto the base.....


Monday, September 15, 2014

Knight Titan 8.0

It was time to ruin a perfectly good paint job. Let's get to chipping. The tools of choice for chipping are a used stiff bristle tooth brush, a coffee stir stick cut at an angle, fresh water, and few paper towels.

I start with the toothbrush, getting it mildly wet and rubbing it over the piece. This well get the paint wet and let the hairspray we used earlier in the build dissolve making it easier to to remove the paint. Then I use the stir stick to chip up little pieces and cut scores into the paint where the hair spray has not quite gotten the message. Then another run with the toothbrush and its time to dry the piece off with the paper towel.


Now it is time to let these fully dry and then I will hit them with two coats of testers gloss coat. Normally when I gloss coat I use Vallejo Gloss Coat through the airbrush but we are going to be putting a few oils down and when you need it tough there is nothing better than Testers (seriously its like shellac for models).

I'll be using a burnt sienna oil for the wash as it will compliment the orange/red I used for the rust colors underneath, and should look pretty darn amazing streaked down the white bits. I am also planning to use some red rust powders and a few other things to make this look really rusty and dirty.

I'll be back around Friday with new update. Till then y'all.