Showing posts with label Warjack. Khador. Show all posts

Sunday, February 19, 2017

Some much needed Red.

Hey there folks. I got a bit of time tonight to work on the bust. I was able to start on the red metallic of the shoulder armor. I started by masking off the skin with Silly Putty. That might sound weird but it's a fantastic way to mask, it does not leave any residue and is really easy to get into cracks and crevasse. More importantly it is easy to remove with no issues.

I started with Vallejo Model Air - Steel which is a bit bright for what I normally use but for this I want it to stick out a bit more before bringing it down with glazes later. Once that was dry I used P3 - Red ink and did a nice fine layer leaving most of the metallic shine.


Then it was time for the gloss coat to seal in the freshness.

I had a bit more time so I spent the next 2 hours building this guy. It's the latest large model for Khador from Privateer Press and is also totally in hard plastic on sprue. Which was nice but a heck of a lot of pieces for one large model.


Saturday, October 22, 2016

Nursing School blues.....

It's just not fun when there is no time to paint. So last night I made an executive decision and took an our out of my schedule to slap something onto a model. I wanted to actually finish something and found a single pose model that had a decent amount of detail that would be easy to do up real quick without spending hours on minutia.

And with that I give you Kovnik Joseph, fondly referred to as Uncle Joe.


Sunday, September 11, 2016

Moar Conquest WIP.

Well I was a good boy and got a bunch of my reading done for class, so I decided to treat myself with a few hours of painting. As I am still waiting on my next commission project to get here I chose to keep working on the Conquest.

I started by working on the fire in the boilers. Of course this thing is so big that it has three! Then it was on to working on the blacks, and let me tell you...... there is a lot of black on this guy, not to mention the black needed for undercoating the metalics that are yet to come.

So have some WIP shots and keep painting!


Wednesday, August 17, 2016

Learning to speed paint.

Recently I was challenged to spend no more than three hours on a unit or model. The painter who challenged me is an award winning painter and fantastic teacher so I listened intently as he dropped the knowledge. I also realized that I was spending way too much time on models that were destined for the table top as game pieces rather than the display case or entries into competitions. With this in mind I set out to "get er done". I chose the Privateer Press Khador Battle Mechanics as my first trial models. They are one piece models with a decent amount of detail, and something I felt I could do well in the limited time.

A few lessons learned.
1. I kept wanting to get detail into ever nook and cranny. I kept having to remind myself that table top was the goal.
2. Blending. I wanted to so very badly to add depth to the colors. Where as for table top a wash and highlight would do just fine.
3 Keeping to a more simple color pallet. There was no reason to use 30+ colors on the models.

So with all that I think the came out really well. I did them up in about 2 hours and 45 minutes.


Saturday, August 13, 2016

The new Privateer Press Battle Box - Khador Edition.

For those of you who don't know or don't play Warmachine a new edition of the rules where released in July. With the new rules came new models and new starter sets. I picked up the Khador box as it is the faction I play and frankly I am a gluten for painting red....

The first thing I noticed about the models were the quality and crispness of the detail. or rather the lack there of. The warcaster (the small based model) was very soft on detail. From the art work you can tell that he has a beard and yet it was barely visible on the model. The injection sights on the war jack molds were placed in silly spots, like on the curve above the head......

So with that in mind and knowing that these would only be used for demo games I painted them up quickly to an acceptable table top standard.


Wednesday, July 27, 2016

Devastator Part 1.0

It's time to bust out ye olde rusting again. It's been a good long while and I figured why not give my self a challenge and go with a good dirty rusted out warjack. Not only good and rusty but lets assume that it was white at some point in it's carrier.

The devastator just seemed to fit the bill. It has good flat vertical lines and nice slopes to make run off and rust streaks look good.

So far i have gotten the basic rust chipping added. In my next post you will see the real magic....

so have a little taste.


Tuesday, June 7, 2016

Karchev Completed.

My God, what a fun model to paint. I loved every bit of working on this one.

So without further ado (and a wall of text).......

The Model!


Sunday, June 5, 2016

Kharchev 1.0

I was debating holding my next post for a finished model, but I have been having so much fun working on this one that I just wanted to share.

If you are not familiar with the Privater Press War Machine Line. This is Kharchev. He is both a big stompy robot (aka War Jack) and a War Caster. Basically he is all the cool things that draws one to the game.


First things first. The model is all metal and big with a capital B for something in all metal. Think about the same size as the old GW Daemon Prince big metal model for reference.

With that in mind, I started of course by removing all the flash and mold lines from each piece of the model. Then it was on to pinning, a lot of pinning.....

With that done I moved on to pinning the model to the base and primed with Vallejo Surface Primer - Grey. Once the primer was cured I coated the model with Vallejo Model Color Grey/Black, Then did the first under highlights using stone grey. I then shot the first red inks using FW - Red. Once that was dry I did the second under highlight using a mix of Vallejo Model Color - Flat Flesh and Vallejo Game Color - Red at a ratio of 10:1. Then I shot the second ink using P3 - Red ink.

It was then time to gloss coat to seal in the freshness. Once the gloss coat was cured I started working on the blacks that would both be on the finished model and for an undercoat to the silvers. Again I used Vallejo Model Color - Black/Grey. Once the tedious process of blacking was completed it was on to the brown undercoat for the golds. I used Vallejo Game Color - Beasty Brown. For the next step I needed to decided what gold I wanted on the model. I decided to go with something a bit darker, so I grabbed Vallejo Model Color - Bronze as a base. Then it was onto the silvers. Again I wanted something darker to start with so I chose P3 - Pig Iron.

Once all that was done I worked on his tiny little half face. Which is a great focal point on the model as its a huge contrast to the big shiny robot body. I started with Reaper - Olive Green as the undertone. then glazed Vallejo Model Color - Bright Flesh. Then I did a very light glaze of purple to give the skin tone a bit more depth, and highlighted back up to Bright Flesh. With all that work done, It was time to gloss coat it again.

Then I added the oil washes. For this model I did two. I used a black and Burnt Umber, The black was used on the reds and silvers, and the Burnt Umber on the golds.

So that's were we leave off. The only things left are to add the highlights and shades to the silvers and golds, work on the base, and add the snow effect.


Sunday, May 22, 2016

Beast 09!

I was able to get this one finished last night while hosting a painting hangout on Google.
Painting hangouts are a great way to meetup with other painters, bounce ideas, joke around and generally have a great time while painting. The best part is that you get to be in your own house in your painting area with all your stuff, It's really the best of all worlds, when compared to painting at your local store (IMHO, but then it is my blog so.....).

Anyway... back to what the topic of the post actually is, This is the Privateer Press - Khador, Beast 09 character Warjack. It's got great fluff and fun game rules. The sculpt for the model is really old and you can really see it in the joins, lines and detail. It's still a fun model to paint and went really fast.


Thursday, May 19, 2016

Finally a new project!

For those that didn't know, my amazing wife and I had baby number 5 a few weeks ago. It is truly an astonishing thing, and quite frankly she is probably the best mini (see what I did there?) we have ever made.

That being said I was finally able to get back into the painting studio to work on models.

I picked the Privateer Press, Khador Beast 09 Warjack as my return project. It's a really old sculpt and time has not been terribly kind to it, and yet it has a quirky character filled feel about it.

As to painting technique. I started with my typical red ink over highlights mix, and got the black added for the undercoat on the soon to be added silvers. Then went ahead and did the browns to under coat the golds. For this one I am actually using Vallejo - Model Color - Brass. My thinking is that its an older model so why not go a bit toned down on all the shiny bits.


So stay tunes. Lots more to come, and I will be back to the posting at least twice a week in the very near future!

Saturday, April 2, 2016

Wooden Plank Base Tutorial. 


I am working on a model for competition and want it to really stand out. One of the best (or if done poorly worst) ways to highlight your models is to put it on a truly inspiring base. 

As this is a bigger model and the base size is 120mm (think the size of a DVD) it gives plenty of room for creativity. 

I have always wanted to try a wooden plank road and this was the perfect opportunity. 

First I gathered up the supplies. 

1. 120mm Round Base (came with the model)
2. Wooden stir sticks - I went with the smaller ones as they are more in scale. I picked them up at Hobby Lobby for $2.20. 
3. Air dry clay - The reason for air dry is that you can't bake the plastic base (fumes are bad.....)
5. A sharp knife
6. Bits to fill in the space. 

With the supplies in hand I started by figuring out how many sticks I would need. 


With that sorted out it was time to cut them down to size. To do this I took the model and measured out a few milliliters out from either side to keep it in scale. 


The next step is easy but time consuming. I marked and cut all the other sticks to size. 


Then it was on to dry fitting to make sure (again) that I had enough of them. 


As you can see not all are exactly the same length and that is on purpose. I want the "road" to have a realistic feel to it. 

Up next was breaking out the clay. I picked this stuff up at Hobby Lobby using the 40% off coupon. The really nice thing about this clay is that its nice and moist and really easy to work with. The down side to air dry clay is that it takes about 24 hours to harden and cure. 


Putting the clay on the base was rather simple. I made sure to leave it pretty lumpy to simulate muddy, bad terrain that would need a road of sorts. 


With that step out of the way it was time to lay out the planks. 

The goal was to lay them out in a semi-organized fashion. Enough to make sure it looks like a road but not OCD to the point that it looks unrealistic. 

As a last step I dipped into the bits box to add a bit of eye candy to mud. I used a gears, a shield from a model and the top of a club. 


And now its time to let the whole thing dry and get ready for priming and painting. 


Tuesday, February 23, 2016

Batch Painting - a few thoughts.


I was waiting for the next gloss coat to dry on the GW tanks yesterday but wanted to get some painting done. I had a few models laying around (who doesn't really?) that were primed and and patiently waiting their turn in line on the shelf. I decided to get them at least base coated. I knew that all of them were going to have strong reds and figured "why waste the paint?"

Batch painting, especially with an airbrush is pretty easy and can save a you a bunch of time. Make sure all of your models are prepped and ready to go. Keep them off to the side so that they are not picking up any over spray, and have at it. Simple really but what a time and effort saver. From base coat to under ehighlights to inks all four models took less than an hour.

So here are some pics....


Monday, January 11, 2016

Vladimir the Dark Champion.


What can I say? This model was an absolute blast to paint up. The reds came out well, I really like how the golds are showing and the crushed glass on the base brings in a bit of realism.

So overall a fantastic model.


Next up is going to be something completely different. That's right folks I am putting away the red for a bit (I know right?!?!)

Monday, December 21, 2015

The end of the year blog post!

Warning, this post will not contain much in the way of hobby content. It's a reflection of what has been.

First I want to thank you for continuing to read my blog. I get a thrill out of logging onto my computer in the morning and seeing the number jump up on how many views I've had the day before. The blog has had an incredible year, I hit 10,800 views over the last 12 months. That is an amazing number in my book! So thank you from the bottom of my heart. It encouraging to see that people actually read what I type and look at my models. It drives me to do and be better each time.

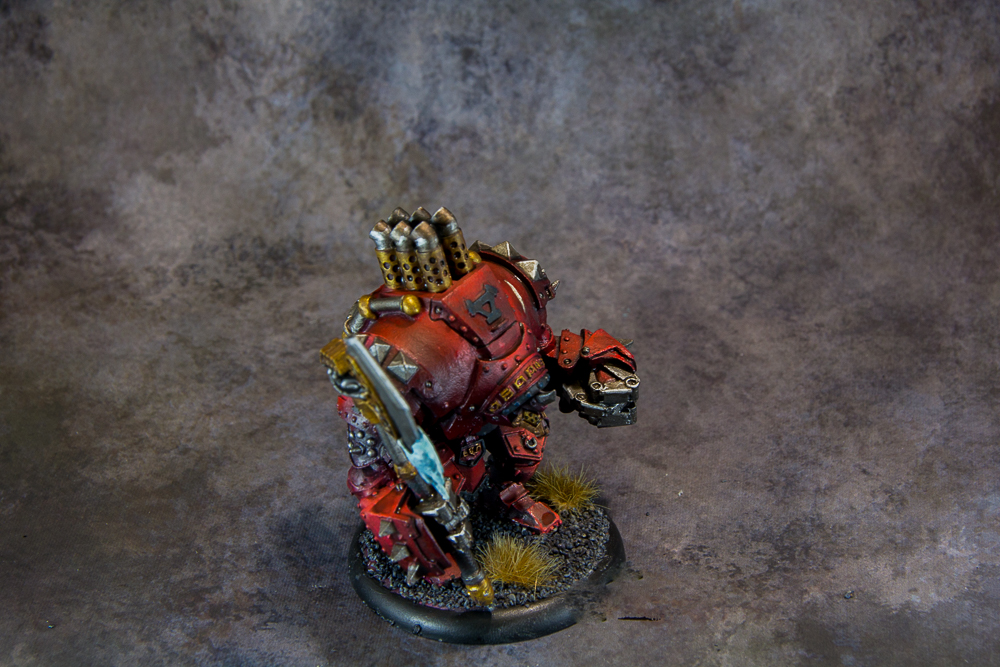
Looking back over the models I've completed this year it's funny to think that I started in January working on my 9 year old son's Protectorate of Menoth models and finished with a display piece from Khador. It was a long and strange year but fulfilling.

What's next?

In the next year I plan to expand on the blog. I am going to reach out and work on different types of miniatures from different game companies. You will see more GW stuff, Some Infinity models. I am really itching to get a hold of a few Knight Models (the batman stuff) and hopefully some Super Dungeon Explorer.

I will also start doing more product reviews as things come in (but that's a surprise for later).

I am also spinning up an honest to goodness YouTube channel. I am going to focus on beginners. There are so many painters on YouTube and they are fantastic but so few of them actually teach the basics. I expect that to start around February, as it takes time to create, edit and upload.

And finally I ask for your feedback. Please leave comments, let me know what you like and what you don't. Tell me what you want to see in the future. This blog belongs to you, so please let me know how you want me to make it better.

I'd like to give a few shout outs as well.

To Secret Weapons Miniatures, Thank you for the fantastic products you produce. Your weathering powders and Crushed Glass really make the miniature stand out!

To Badger Airbrush Company - I use your Patriot 105 and Renegade Khrome religiously. They are both excellent and continue to impress.

To Vallejo - Your paints rock, and your airbrush thinner is top notch!

To Privateer Press - I love your models they are inspiring to paint (even when I curse the crazy details sometimes). Also the more I use the P3 paint line the more I love it.

To Hanger 18 Miniatures - Thank you again for providing backgrounds for photography. The quality and look are just fantastic.

To Painting with Menoth John - Keep putting out your show. There are many a night (or day) that I have you on in the background while painting. Ya'll are inspiring, in your own sick and twisted (in a good) way.

And last but not least to my Wife and Kids, who put up with the long hours of painting,

So here is to what was an amazing 2015, and to an even better 2016!

And again I thank you, I couldn't do it without you!

See ya next year folks.

Sunday, December 13, 2015

At long last the Bombardier Bombshell is finished!

After the oil washes were I applied I went back over the model and highlighted the gold and silvers. Then it was onto finishing the base. I used Army Painter bushes things for the fauna to break up the space, and I used Secret Weapons Miniatures - Crushed Glass for the snow. It's pretty easy to do, just use some clear resin as glue (aka Realistic Water) then sprinkle the glass over it, drop a bit more resin on top... and you have snow. Now a much needed word of caution with this stuff. It's crushed glass, you do not want to breath this into your lungs, like not even a little bit. Use a mask, at least an N-95 if not a respirator, and gloves. Pour over a box or something that can catch it all. Seriously it's dangerous stuff if you don't take precautions.

Then it was time to assemble the model and get her on the base.


So here she is. I purposefully shot these photo's with no extra lighting on the light box to show the painted highlights without having the light wash them out.

Once the resin drys fully on the glass, I'll do pro pictures with her on a real background with real lighting.